Quickorders Knowledge Base Get Support 24/7

Customize Food Categories in Quickorders

The categories section is designed to help restaurant partners organize their menus into logical groupings, making food discovery easier for customers and smoother for backend management.

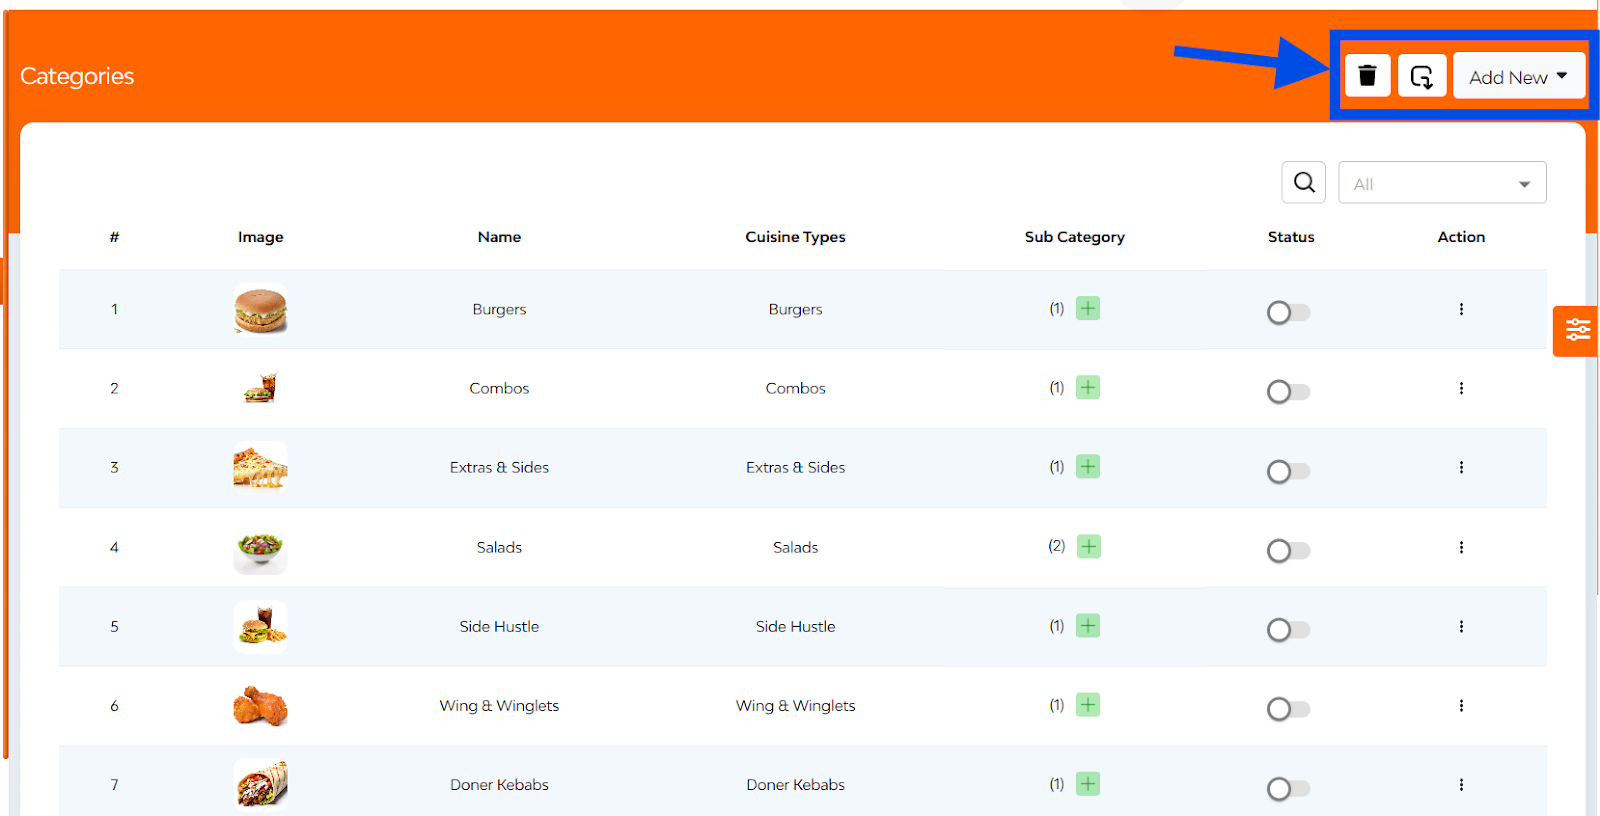
At the top right of the interface, you’ll find three essential action buttons:

  1. Delete
  2. Export
  3. Add new (Add Category, Add Sub-Category)

Here you can see a sorted table with the following columns like image, name, cuisine types, sub category, status(Toggle to Block or Unblock the category), action (edit, delete copy ID).

+Adding a Category

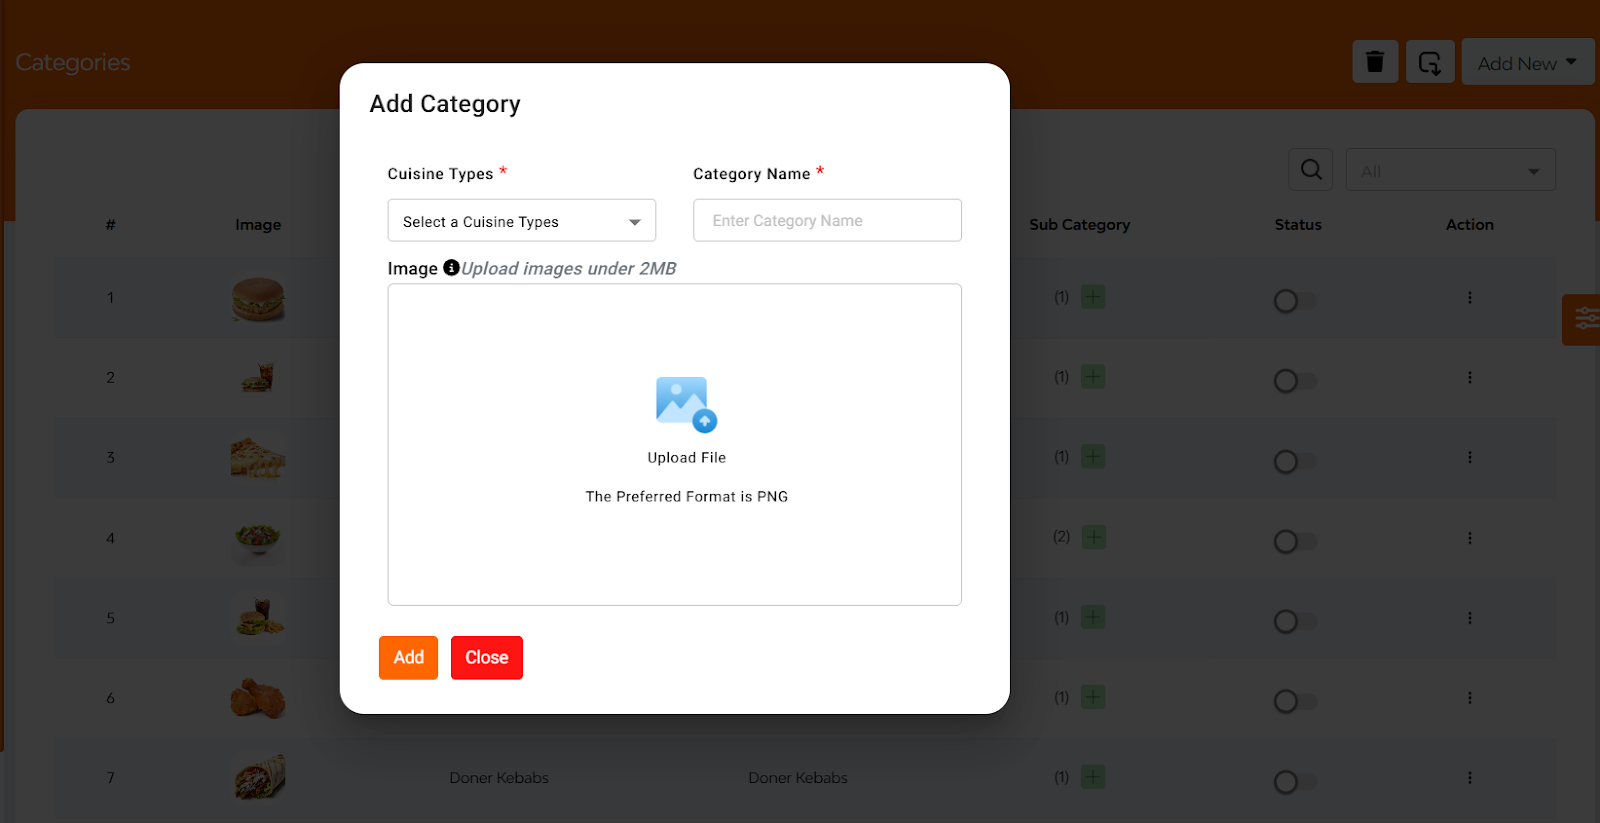
When “Add Category” is selected, a pop-up form appears where you can:

  • Select Cuisine Type
  • Enter Category Name
  • Upload Category Image
  • Tap “Add” to save and create the new category.

+Adding a Sub-Category

When “Add Sub-Category” is selected, a separate pop-up form opens:

  • Select Category
  • Enter Sub-Category Name
  • Upload Sub-Category Image

Tap “Add” to save the sub-category

FAQ's

The Categories section allows the Admin to manage all food or product categories displayed on the platform. This includes creating, editing, enabling/disabling, or deleting both categories and subcategories.

Each category listing includes:

  • Serial number
  • Image
  • Category name
  • Associated cuisine type
  • Subcategories
  • Status (enabled/disabled)
  • Actions (Edit, Delete, View Subcategories, Copy ID)

Click the edit icon next to any category. Update the name, cuisine type, or image, and then click Update to save changes. The updated info reflects immediately in the list.

Yes. By clicking the delete icon, the category will be removed permanently. Deleting a parent category will also affect its subcategories.

It copies the unique identifier (ID) of the category to your clipboard. This is useful for backend references or linking data.

Click on the “Subcategories” button under the category entry. This opens a list of all subcategories linked to that specific category.

Admin can:

  • View all subcategories under a selected category
  • Enable/Disable specific subcategories
  • Edit name or image of a subcategory
  • Add new subcategories

Go to the Subcategories section, click “Add New Subcategory”, choose the parent category, enter the subcategory name, upload an image, and click Save.

Yes. Use the filter dropdown to select a cuisine type. Only the categories associated with that type will be shown.

Type in the name of the category in the search bar, and the system will instantly show matching results for quicker access.

The panel is paginated. You’ll see 10 categories per page. Use the pagination controls at the bottom to navigate between pages.

Yes. There’s an Export option that lets you download the full list of categories and subcategories to your local system for reporting or backup.

Click on “Add New Category”, select the cuisine type, enter the category name, upload a category image, and then click Create or Save.

Disabling a category or subcategory will hide it from the customer-facing platform, but it remains in the system and can be enabled again anytime.

Yes. An image is mandatory for visual representation on the platform. If you skip the image upload, the system may show a prompt or prevent saving.

Deleted categories are not recoverable unless you’ve exported a backup. Always confirm before deletion.

Yes. You can disable them instead of deleting. This keeps the data intact but hides it from the user interface.

Yes. All changes made via the Admin Panel (edit, add, delete, enable/disable) are instantly reflected across the platform.