
Quickrides Knowledge Base Get Support 24/7
Settings
The Settings module empowers you to manage everything from business branding to system integrations.
Here’s what you can manage from this central hub:
PROJECT DETAIL
Within settings, click on Project Detail.
General Settings
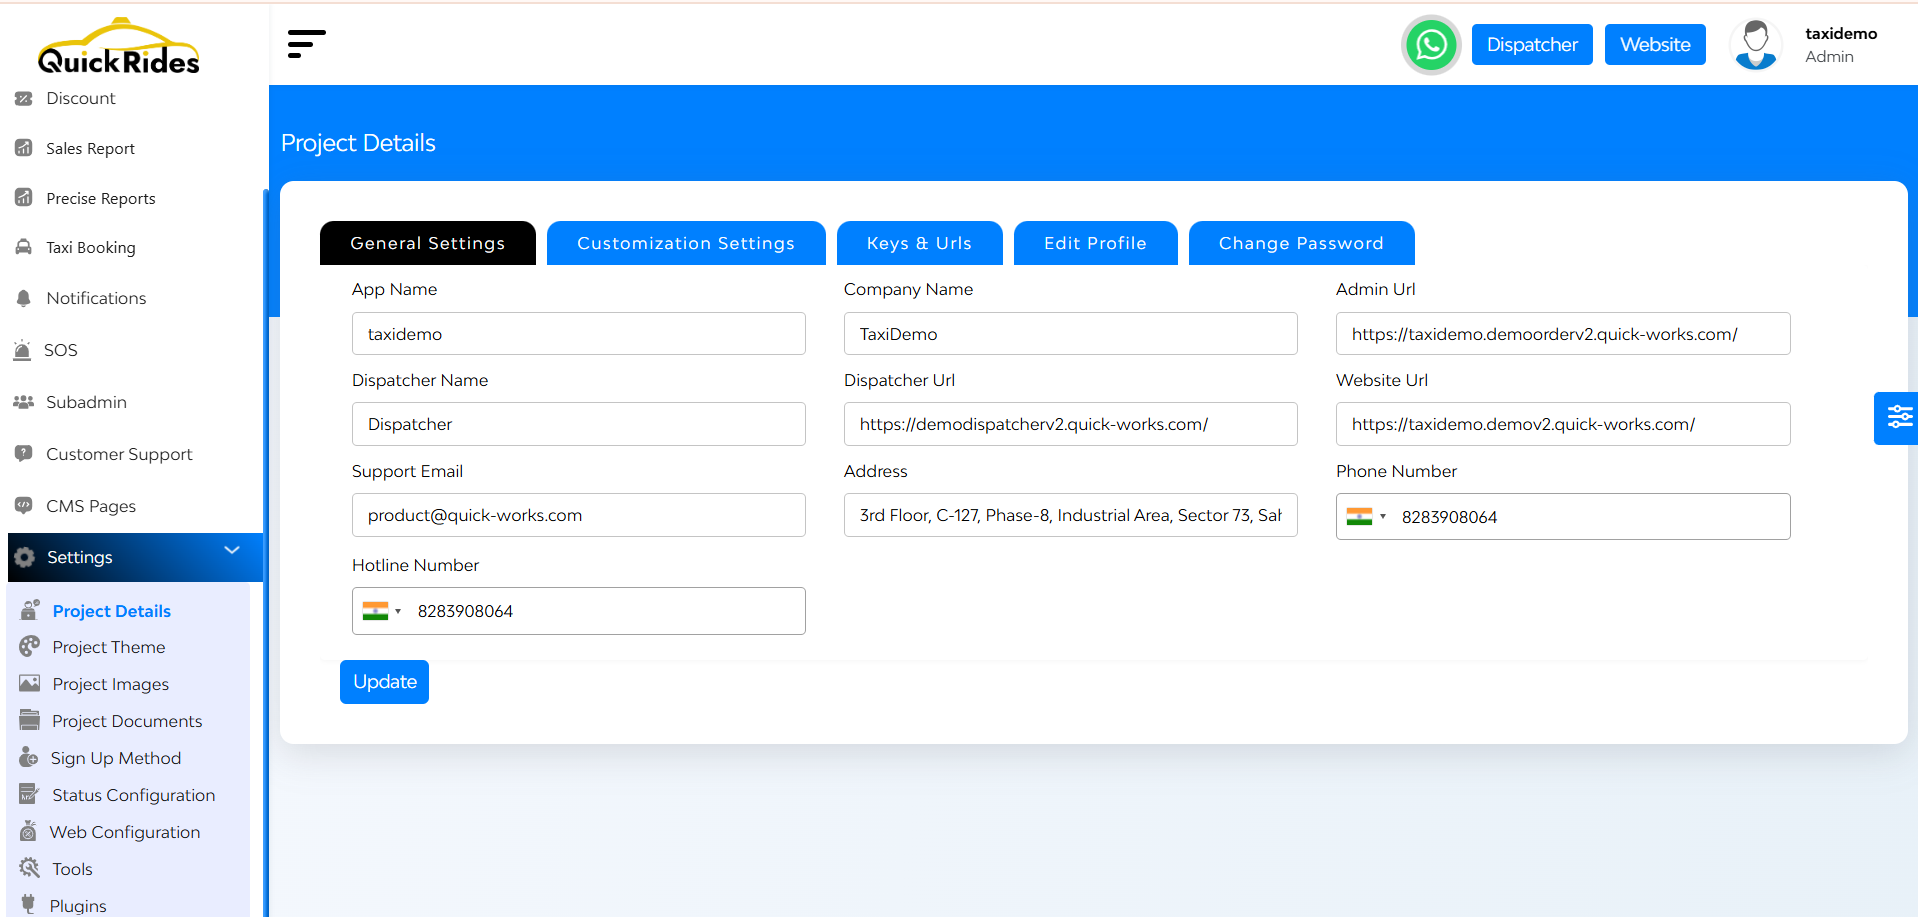
This subsection allows the admin to modify General Settings of the project, including:
- App Name
- Company Name
- Admin URL
- Dispatcher name
- Dispatcher URL
- Website URL
- Support email
- Address
- Phone no
- Hotline no
Customization Settings
You can also customize your settings according to your requirements:
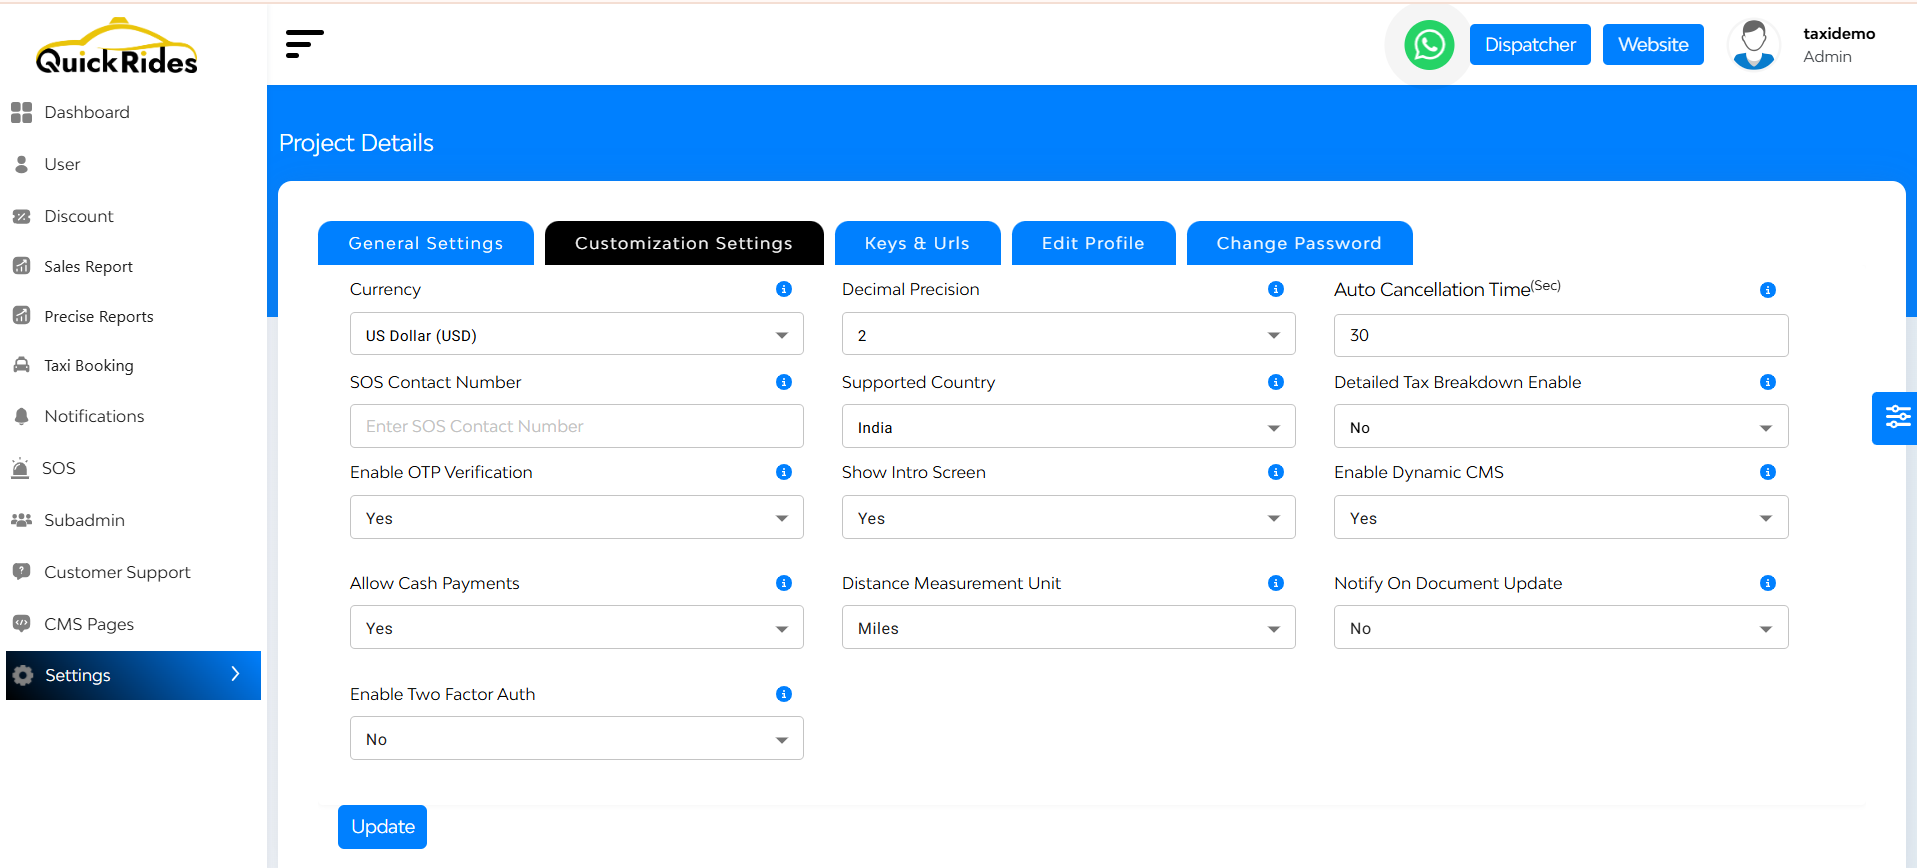
- Currency & Decimal Precision – Define how prices appear, e.g., in INR/USD and round up to 1 or 2 decimals.
- Auto Cancellation – Set a timer to cancel unconfirmed bookings automatically.
- SOS Contact Number – A number users can reach in emergencies.
- Supported Countries – Limit operations to selected countries.
- Tax Breakdown – Show detailed taxes in user invoices.
- OTP Verification – Adds a security layer for actions like login or booking.
- Intro Screen – Welcome users with a splash or tutorial screen.
- Dynamic CMS – Let you update app content (like terms) without code changes.
- Allow Cash Payments – Enable or disable cash as a payment mode.
- Distance Unit – Choose between kilometers or miles for distance measurements.
- Notify on Doc Update – Alerts users of key documents (e.g., driver’s license) that expire or are modified.
- Two-Factor Authentication – Adds extra login security for admins/users.
Keys & URLs
Admin Panel → Settings → Project Details → Keys & URLs
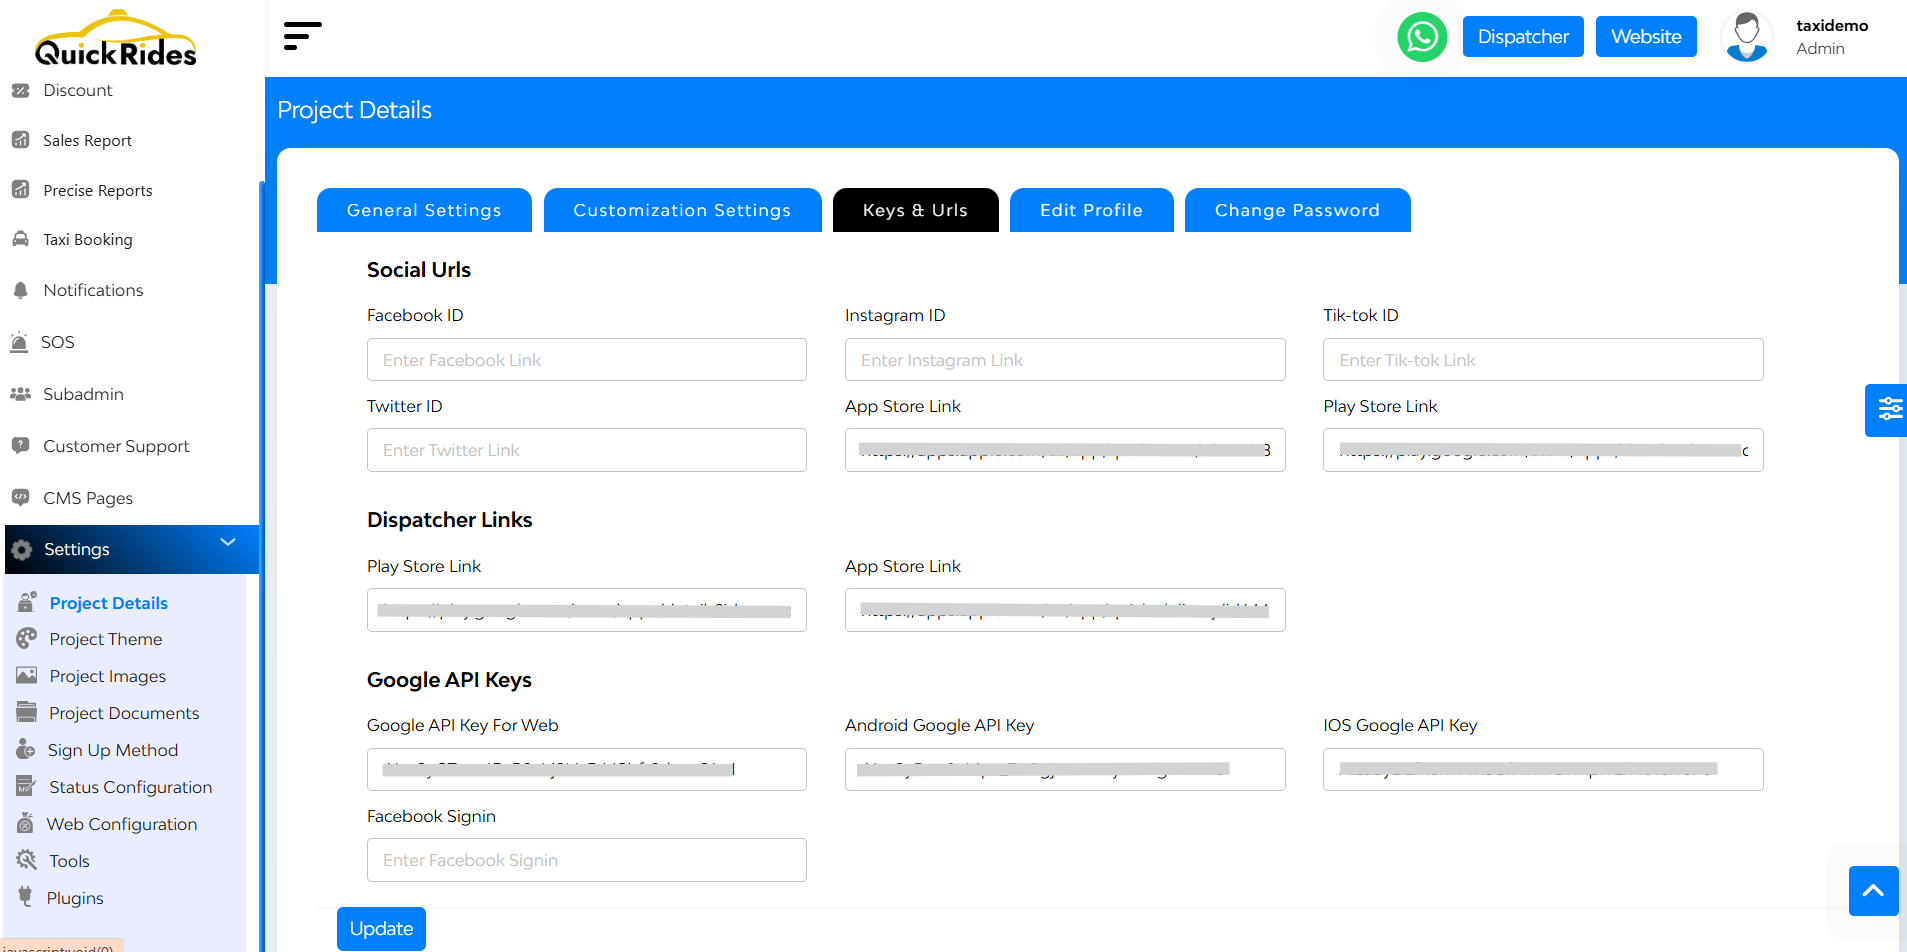
Here you can find
Social URLs: Add links for Facebook, Instagram, TikTok, Twitter, App Store, and Play Store — so users can find, follow, and download your app easily.
Dispatcher Links: Direct links to your dispatcher apps for both Android and iOS, making it easy to access for drivers or logistics managers.
Google API Keys: Required for using maps, location tracking, and more — set for Web, Android, and iOS.
Facebook Signing Key: Enables secure Facebook login and app integrations.
Edit Profile

- Upload Image
- Name & Contact
- Update
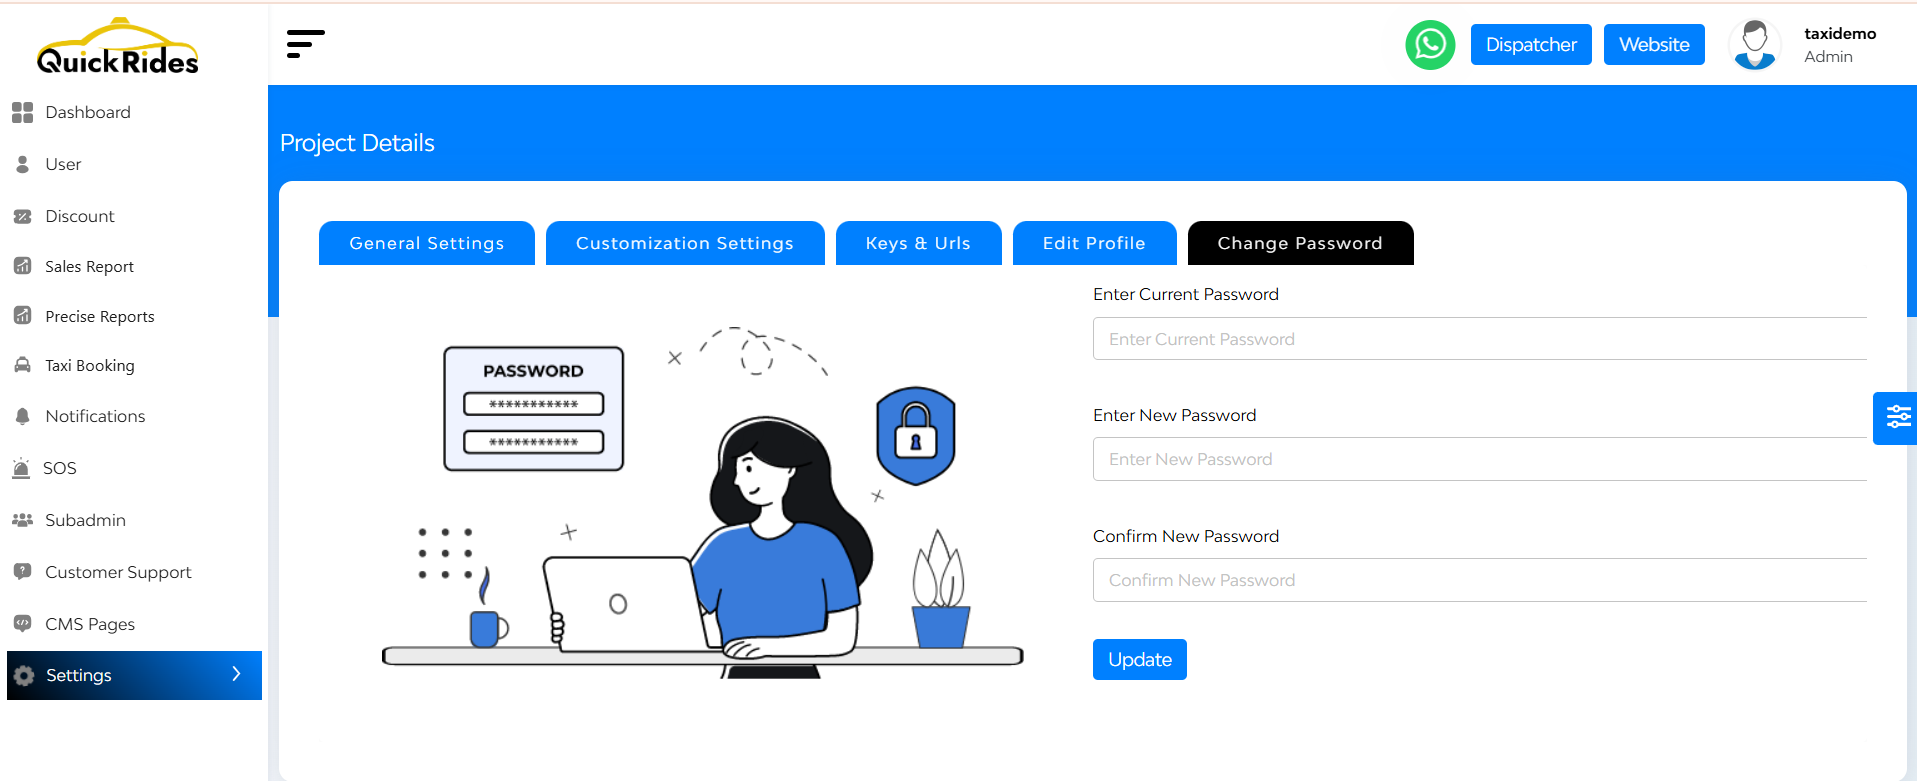
Change Password
Project Themes
Here, the admin can manage the color settings for both end customers and panels, allowing for effective branding and user interface customization.
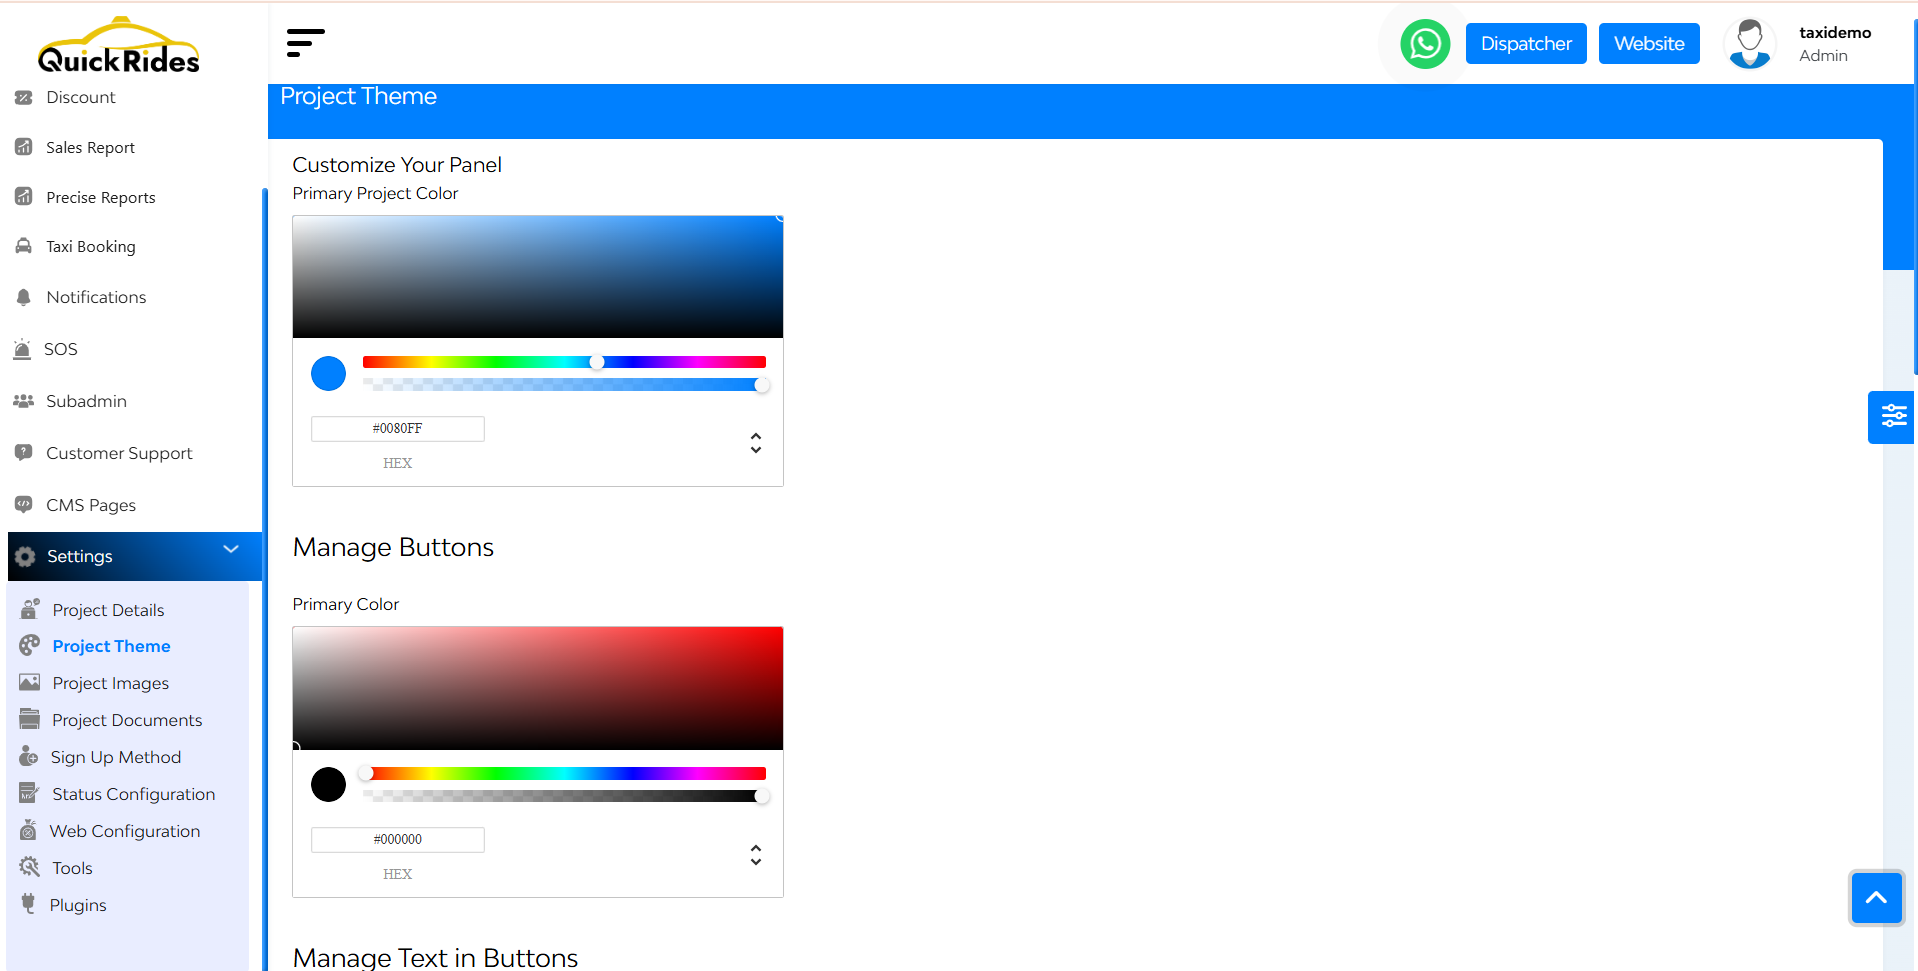
Navigate to Project Theme under Settings.
Customize color themes for:
- Customer-facing interfaces
- Admin and Merchant panels
Options typically include selecting from predefined themes or customizing individual color elements.
Project Images
This section enables the admin to oversee the project’s images.

Manage and Upload Images Such As:
- Admin Logo
- User
- Website Image
- Merchant Login Banner (here you can include title & description)
- App Home Page Banner
Project Documents
This subsection likely pertains to managing documents related to the project, such as terms of service, privacy policies, or other relevant files.
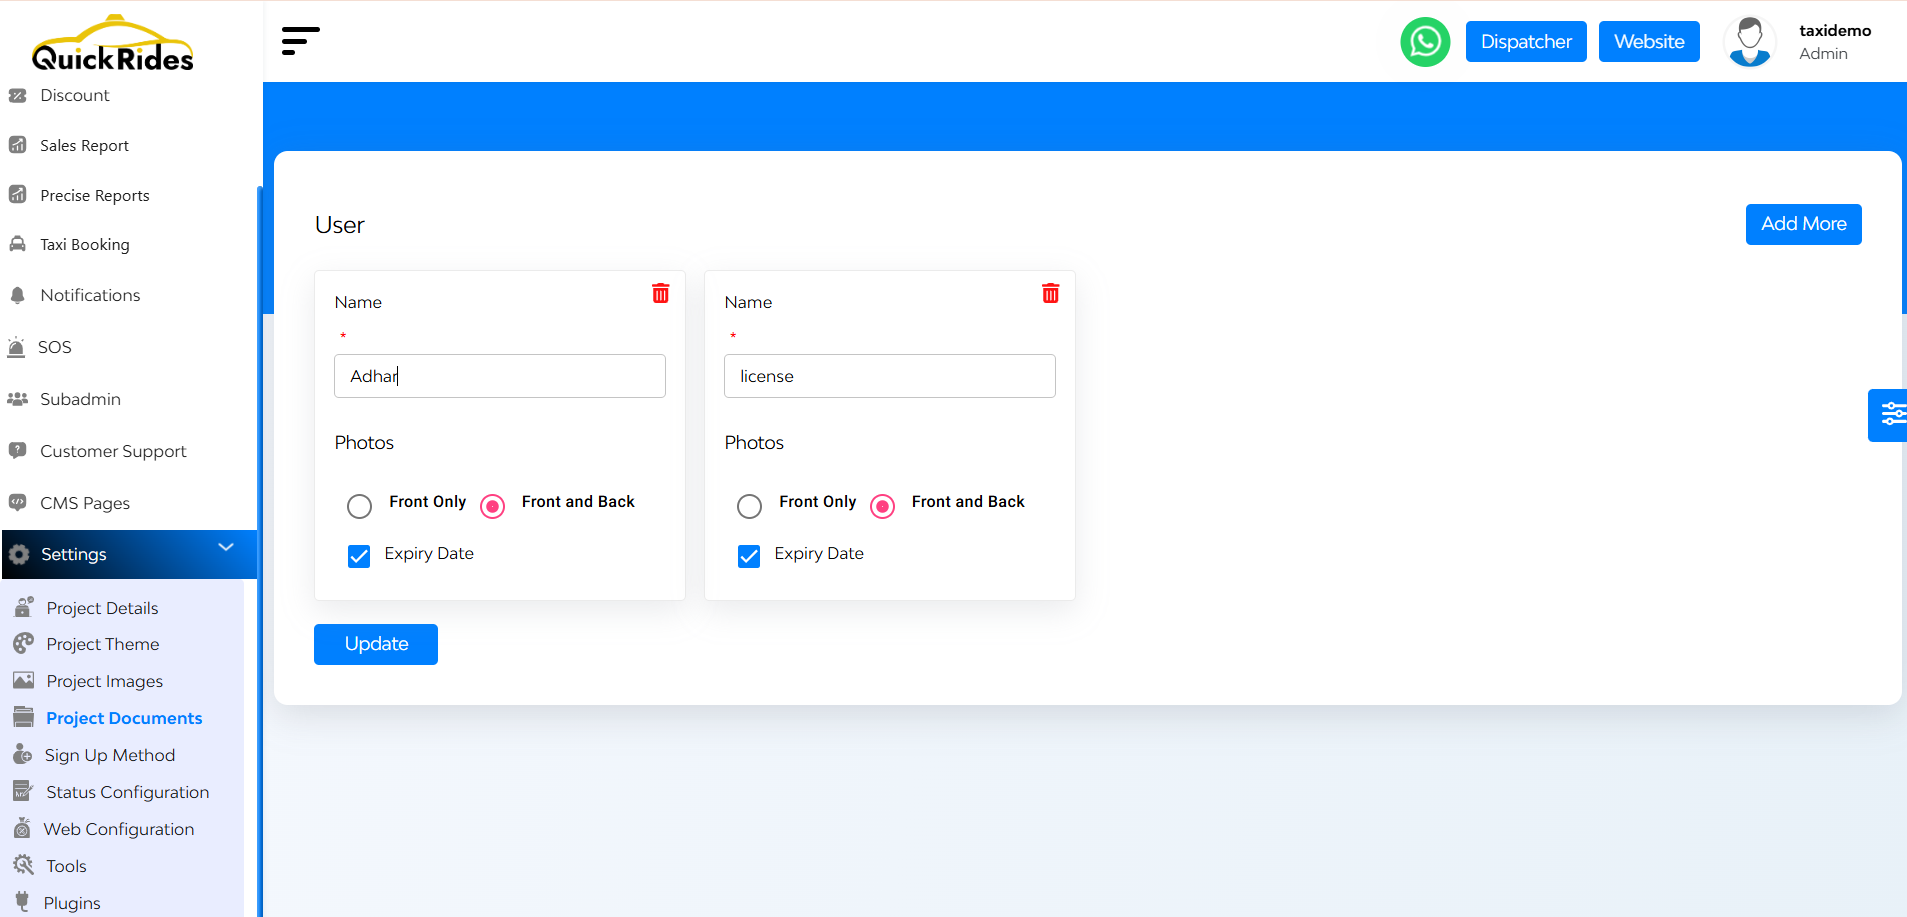
Select Project Documents from the Settings menu.
Upload and manage essential documents like:
- Terms and Conditions
- Privacy Policy
- User Manuals
- Any other relevant documentation
Signup Method
This area allows the admin to configure how users sign up for the service.
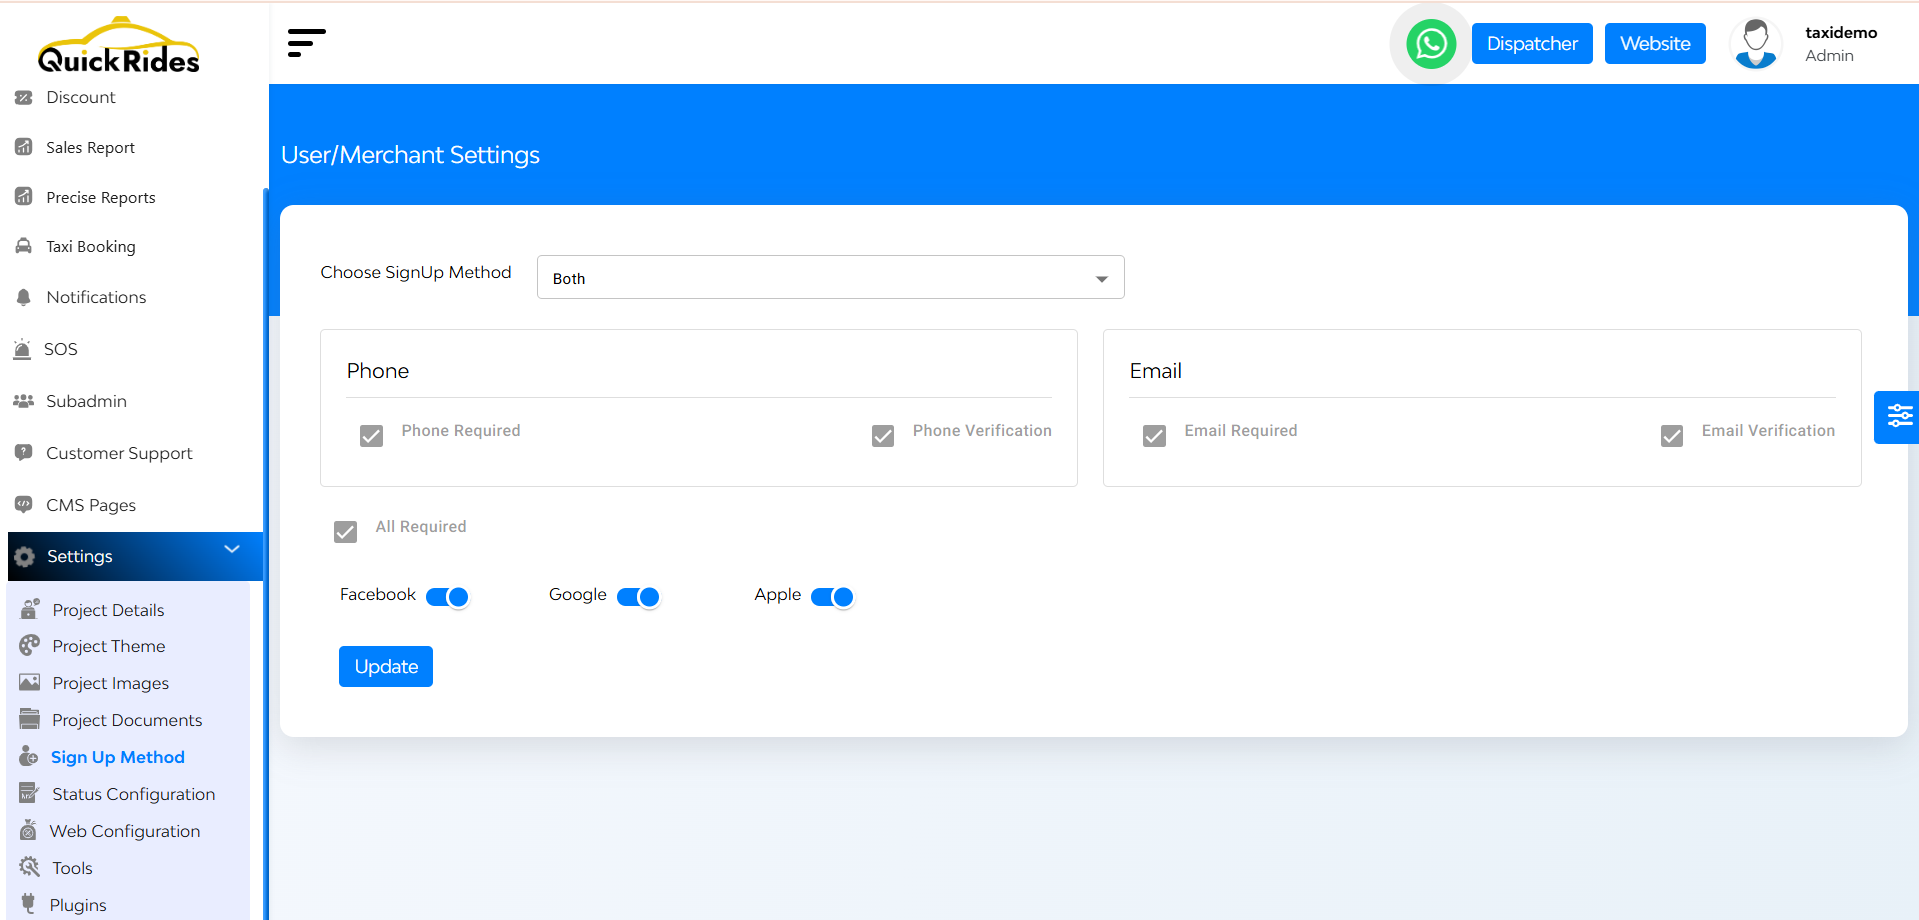
Configure user registration options:
- Enable or disable social media signups (e.g., Google, Facebook)
- Set up OTP verification methods
- Determine required fields for registration
Status Configuration
Within this subsection, the admin can configure order statuses.
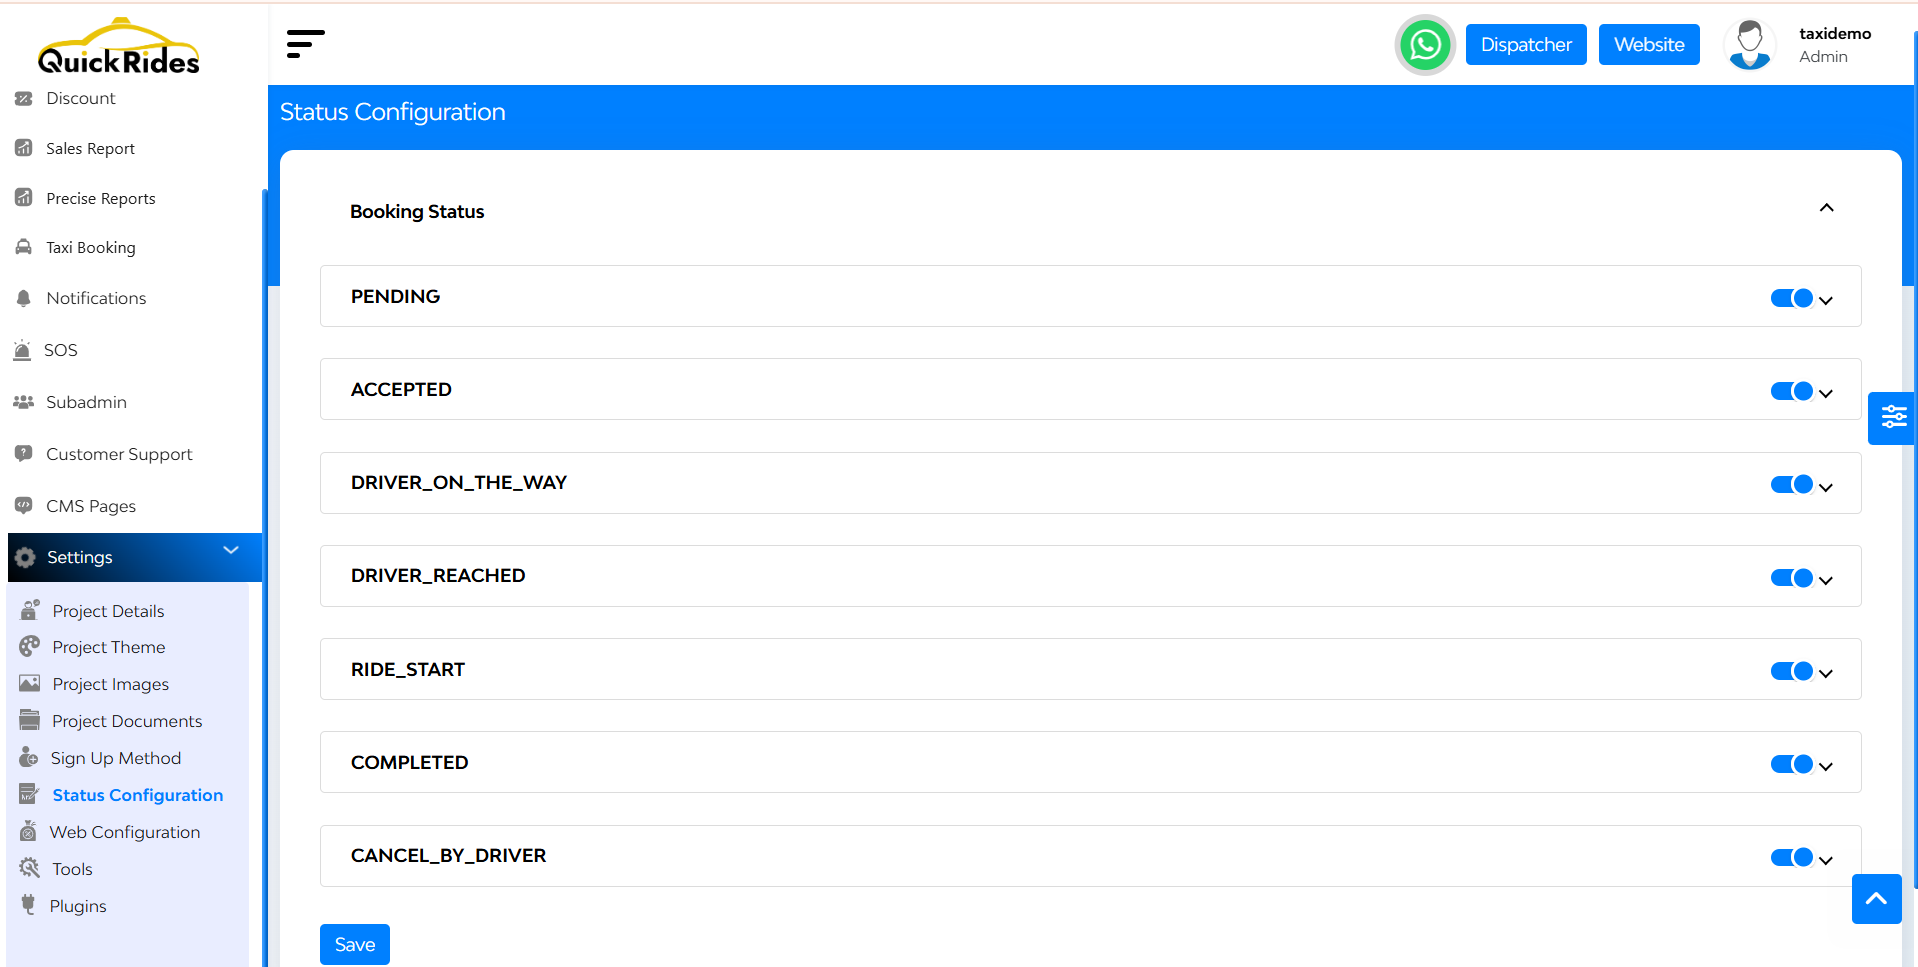
Adjust order and booking statuses:
- Modify status labels and titles
- Set cancellation charges and time limits
- Customize status flow as per business requirements
Web Configuration
This section deals with settings related to the web interface of the application. this lets you manage how your landing page communicates with users by customizing short and engaging content blocks.
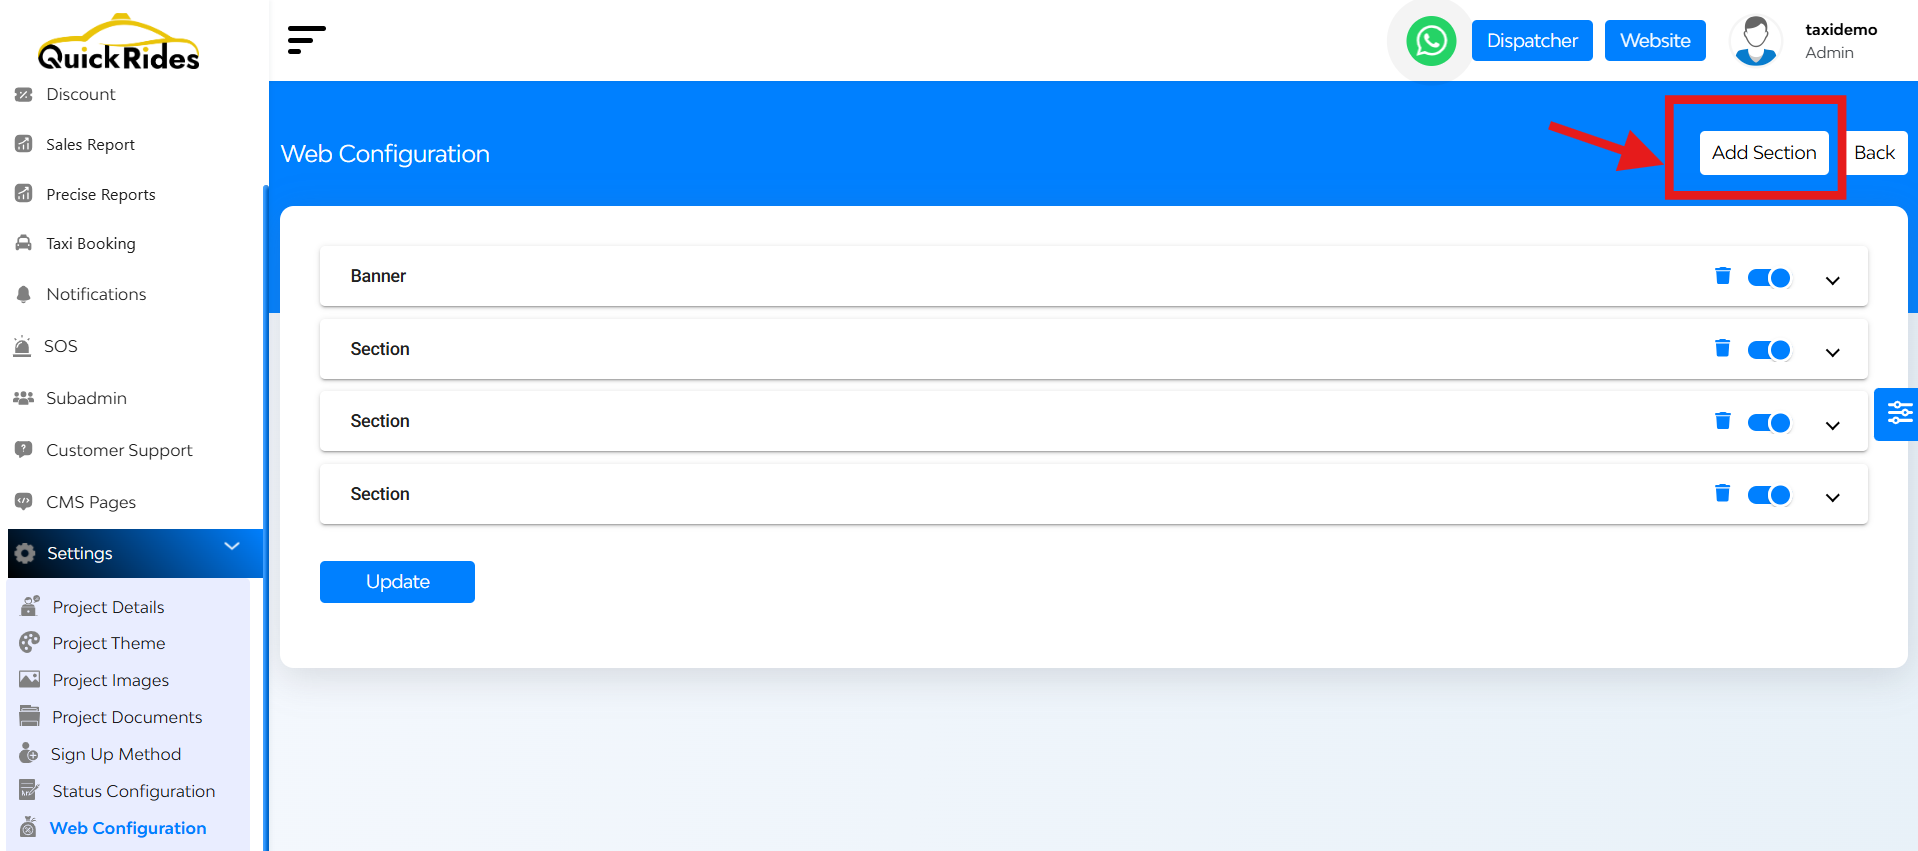
At the top right corner “add section” button is there.
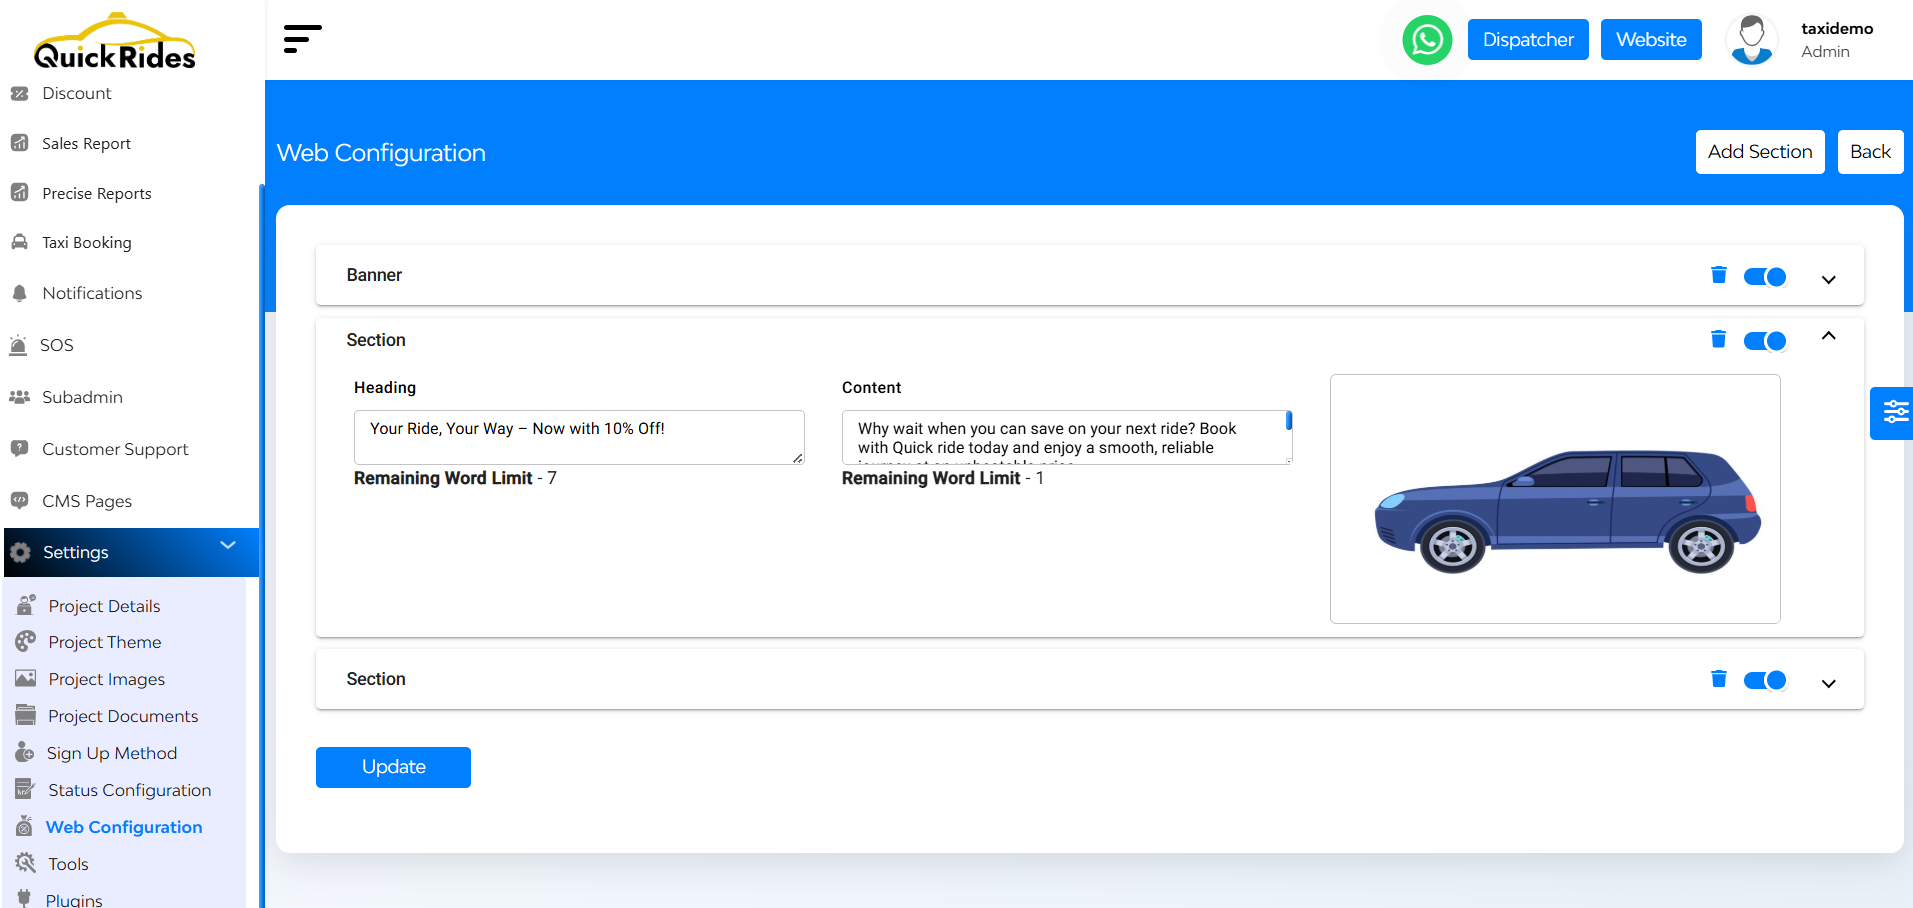
While tapping on that you can easily create sections for your web interface.
- Heading – Add a catchy line (up to 15 characters)
- Content – Add supportive text (up to 90 characters)
Tools
In the tools subsection, the admin can upload bulk orders and fine-tune modules easily.
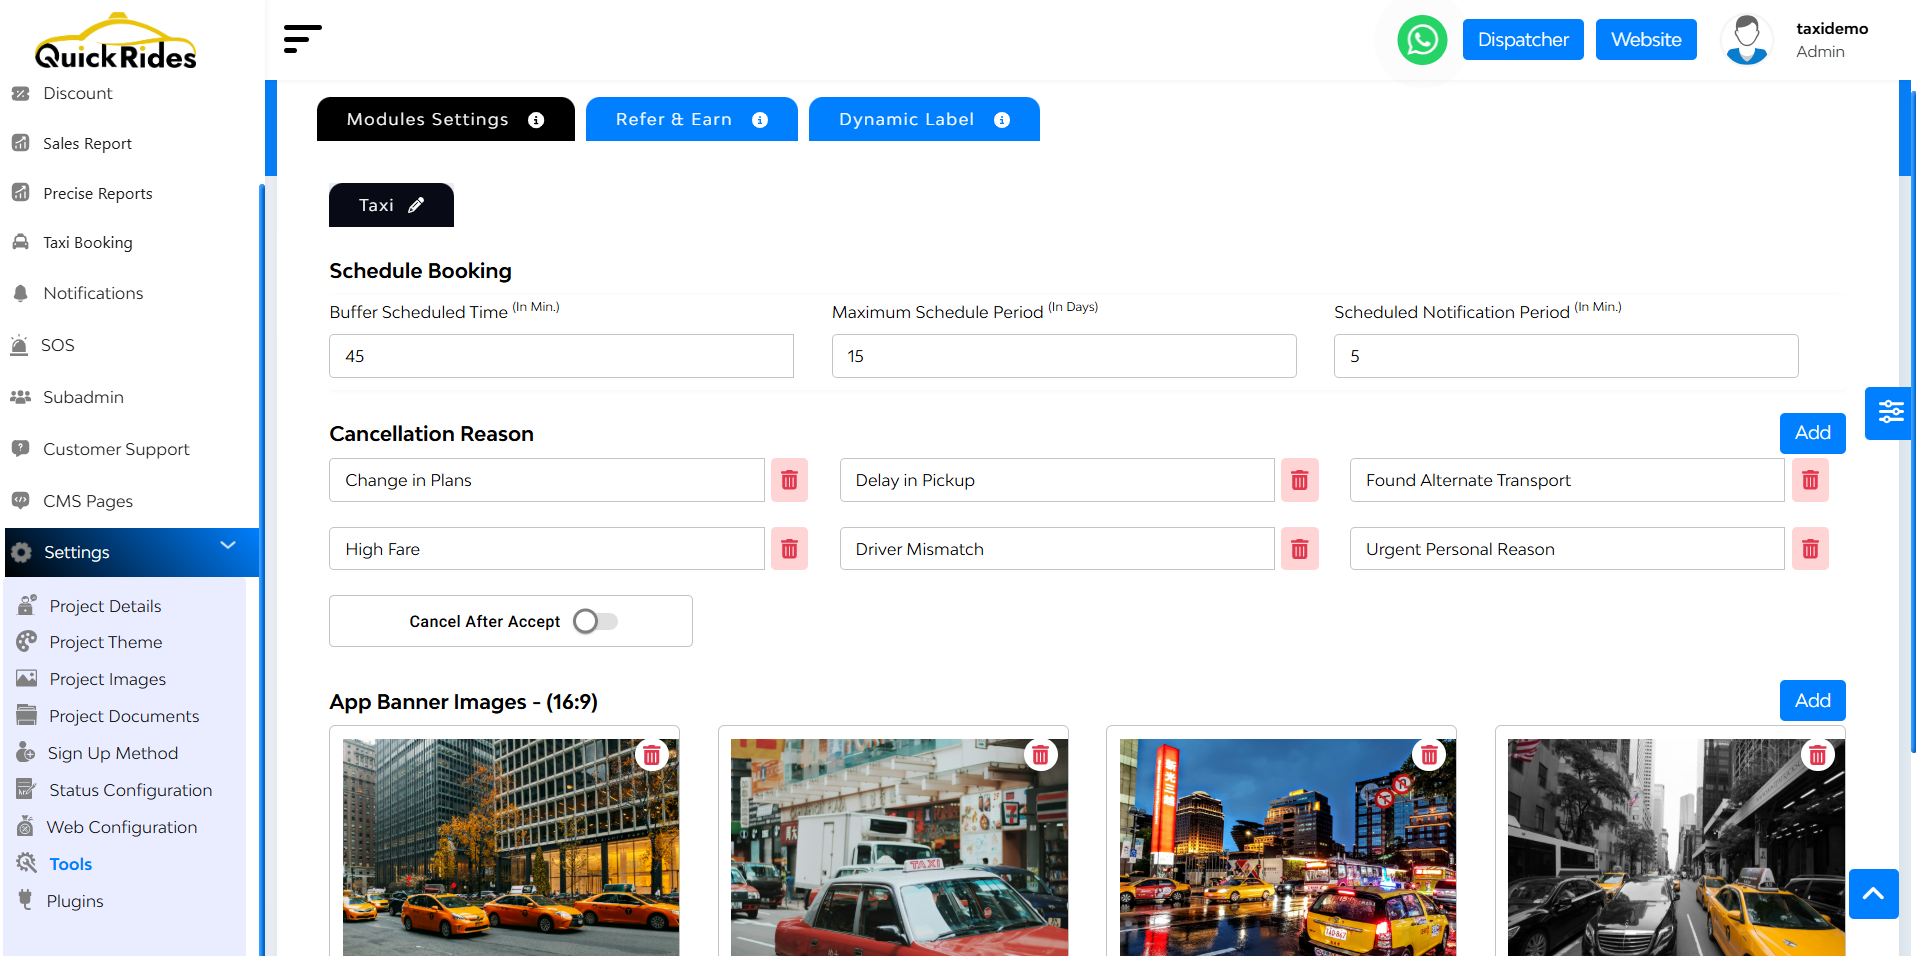
Modules Settings
Schedule Booking Settings
- Buffer Scheduled Time – Gives drivers enough heads-up before a ride starts.
- Maximum Schedule Period – Limits how far in advance a booking can be made.
- Scheduled Notification Period – Sends alerts before a scheduled ride kicks in.
Cancellation Reasons: Let users and drivers select a reason for canceling, keeping feedback clear and organized.
App Banner Images: Customize banners for various panels, perfect for promotions, alerts, or branding.
SOS Settings: SOS Type & Method: Define how users request emergency help (e.g., call or message), and who gets notified.
Refer & Earn
The feature that enables users to recommend others to the app, offering rewards or incentives for successful referrals.
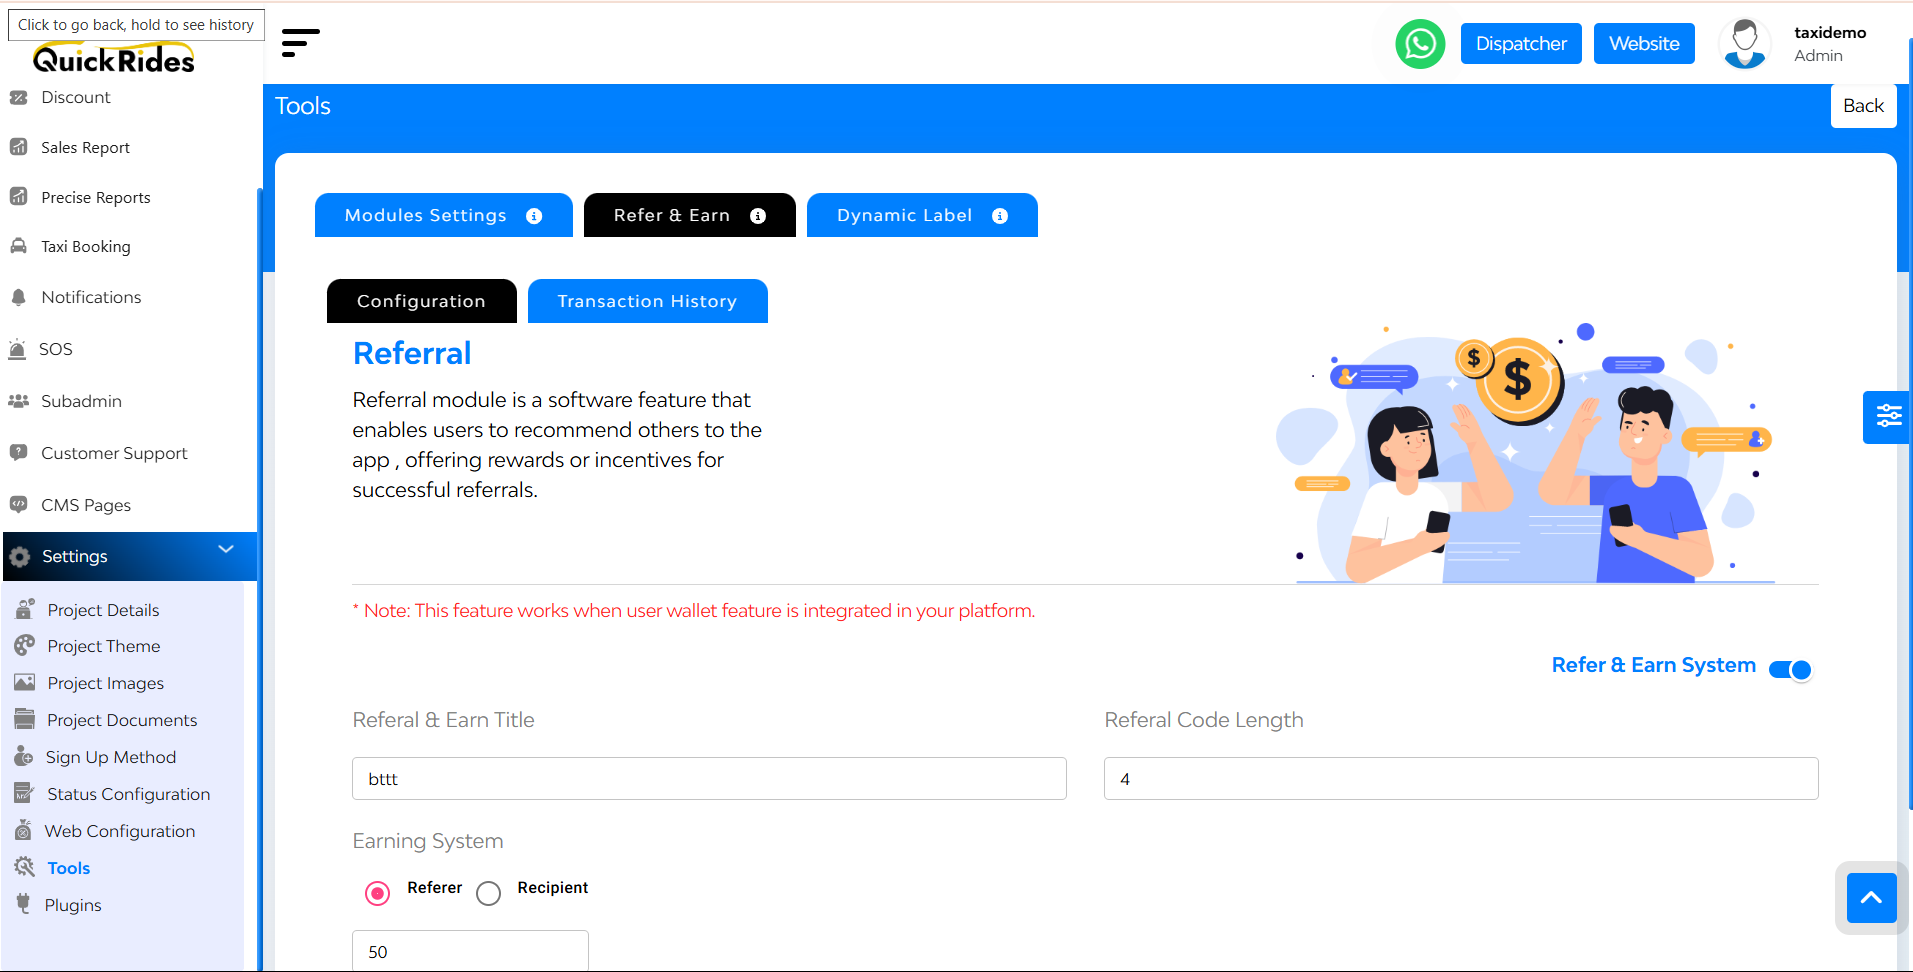
Configuration Tab
- Referral & Earn Title
- Referral Code Length
- Earning System – Choose who earns: the referrer, the referred, or both.
- Submit
Transaction History Tab
- View referral details including date, referrer, referred user, and earned amounts for both parties.
Dynamic Label
Here you can create dynamic labels with custom URLs for both customers and merchants. View existing labels with their type, creation date, and actions to edit/delete.
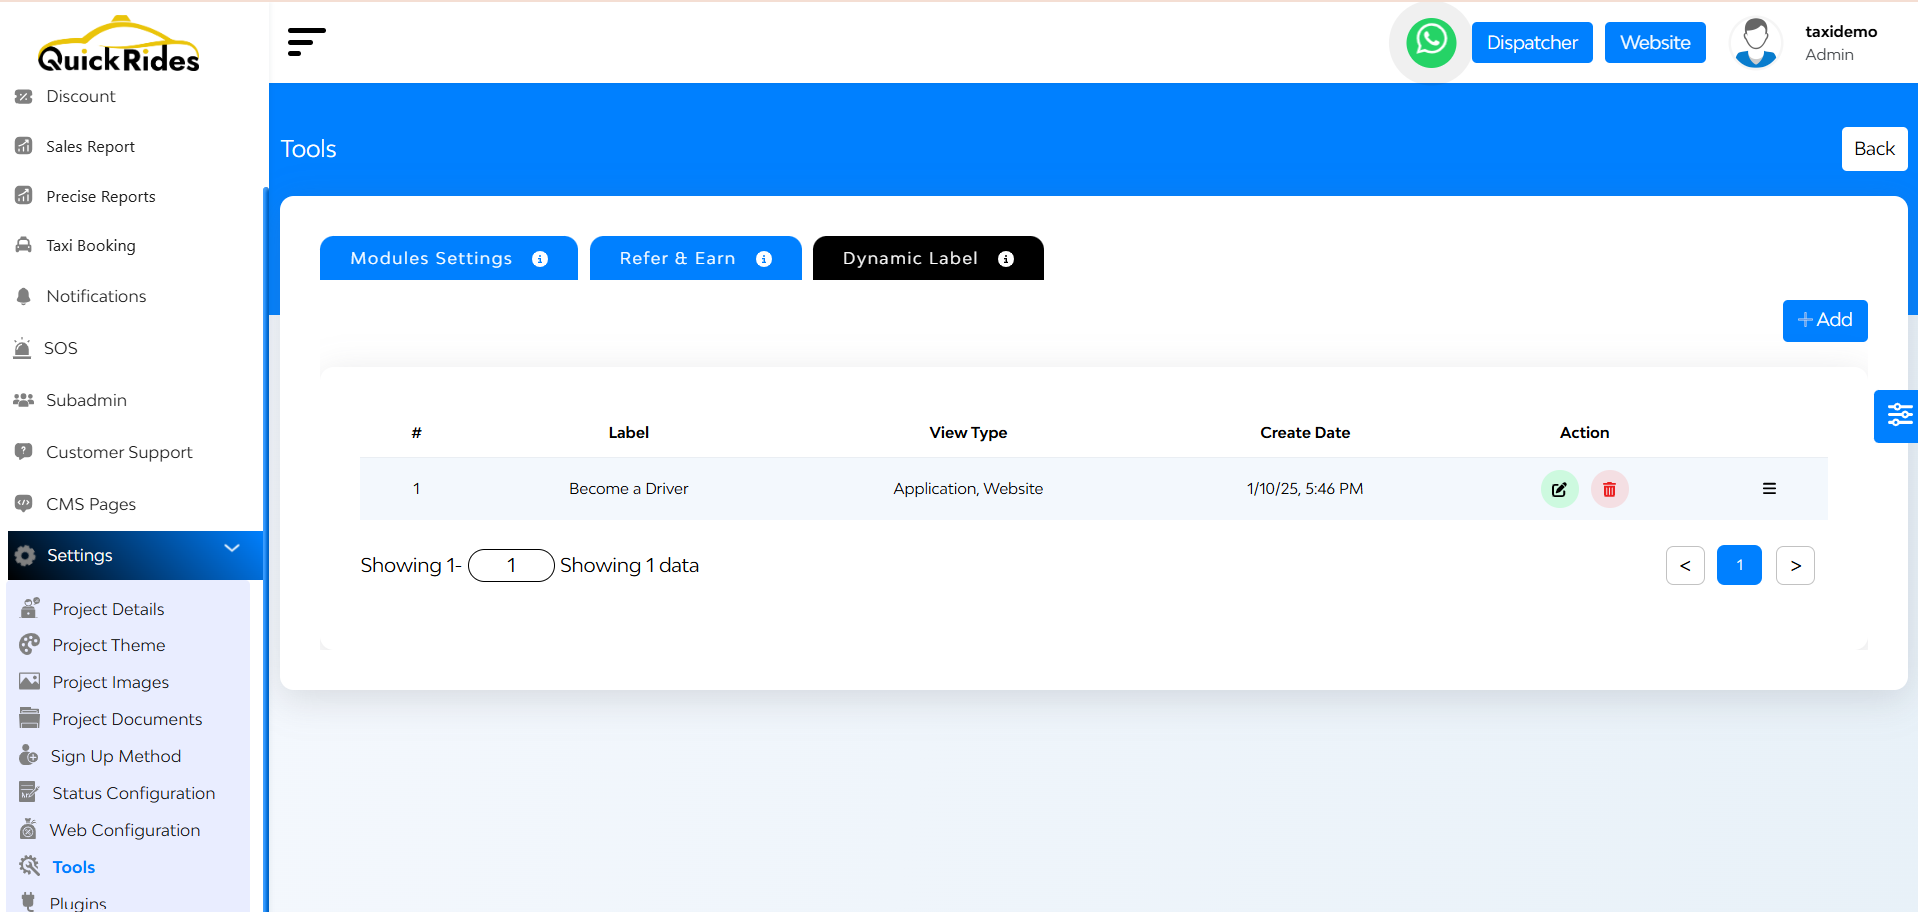
+ Add Users
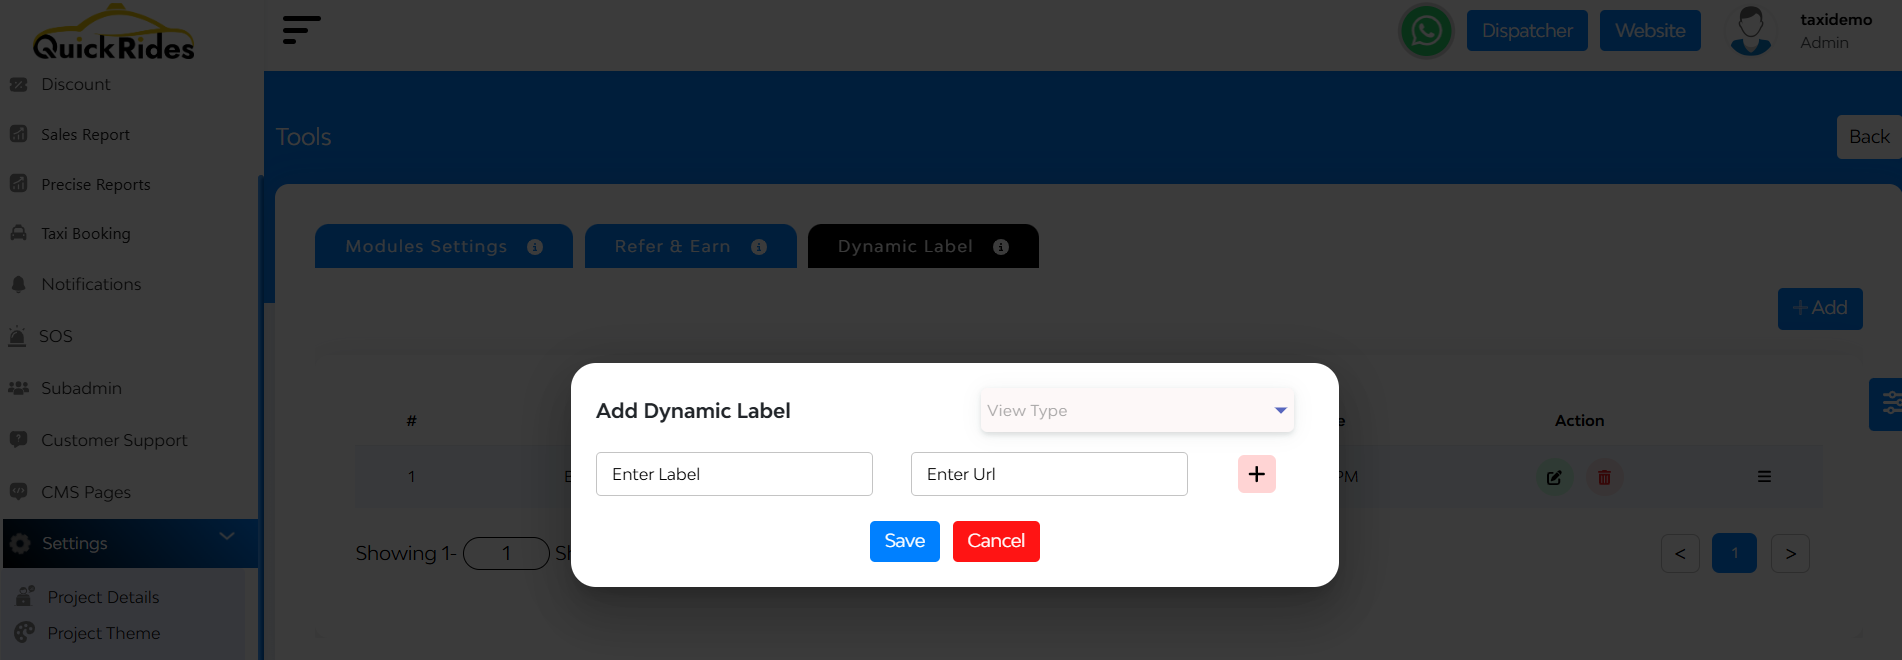
Use the top-right tab to enter a label name and destination URL, pick the target (app or web), and hit Save.
Plugins
This subsection provides options to integrate various plugins into the panel.
Within Settings, go to Plugin.
Integrate and manage plugins such as:
- Payment Gateways (e.g., Stripe, PayPal)
- SMS Gateways
- Email Services
- Other third-party integrations
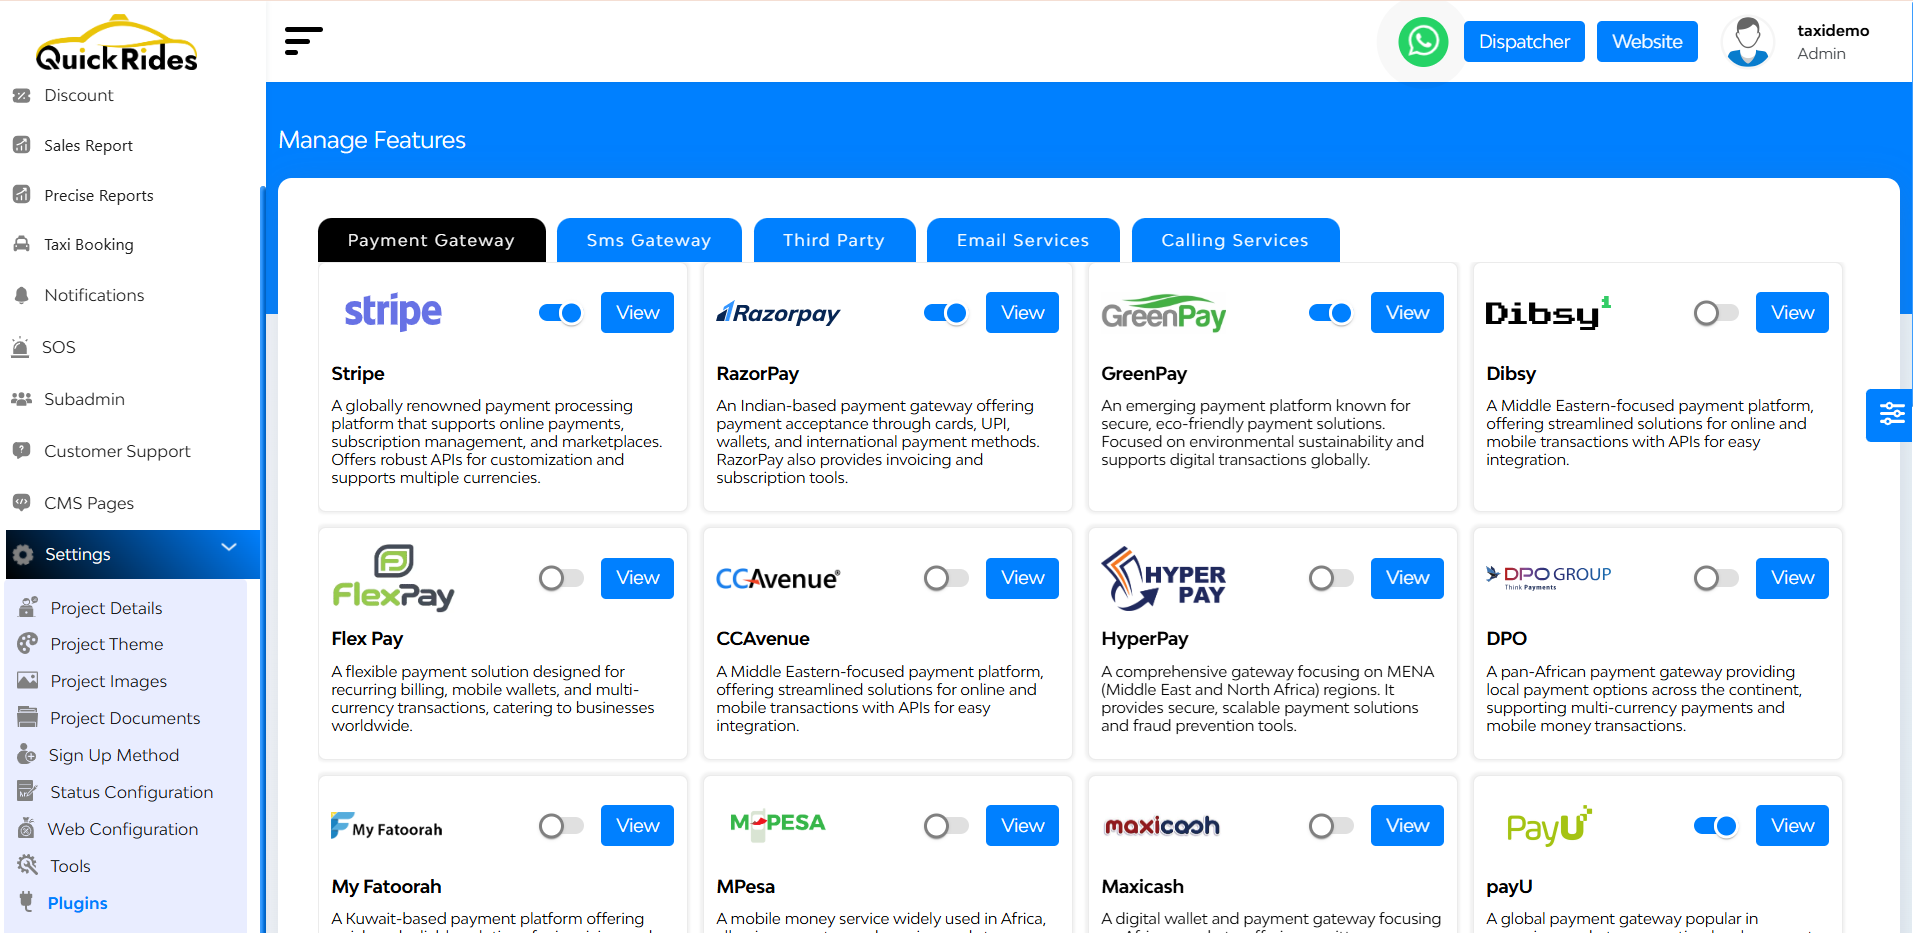
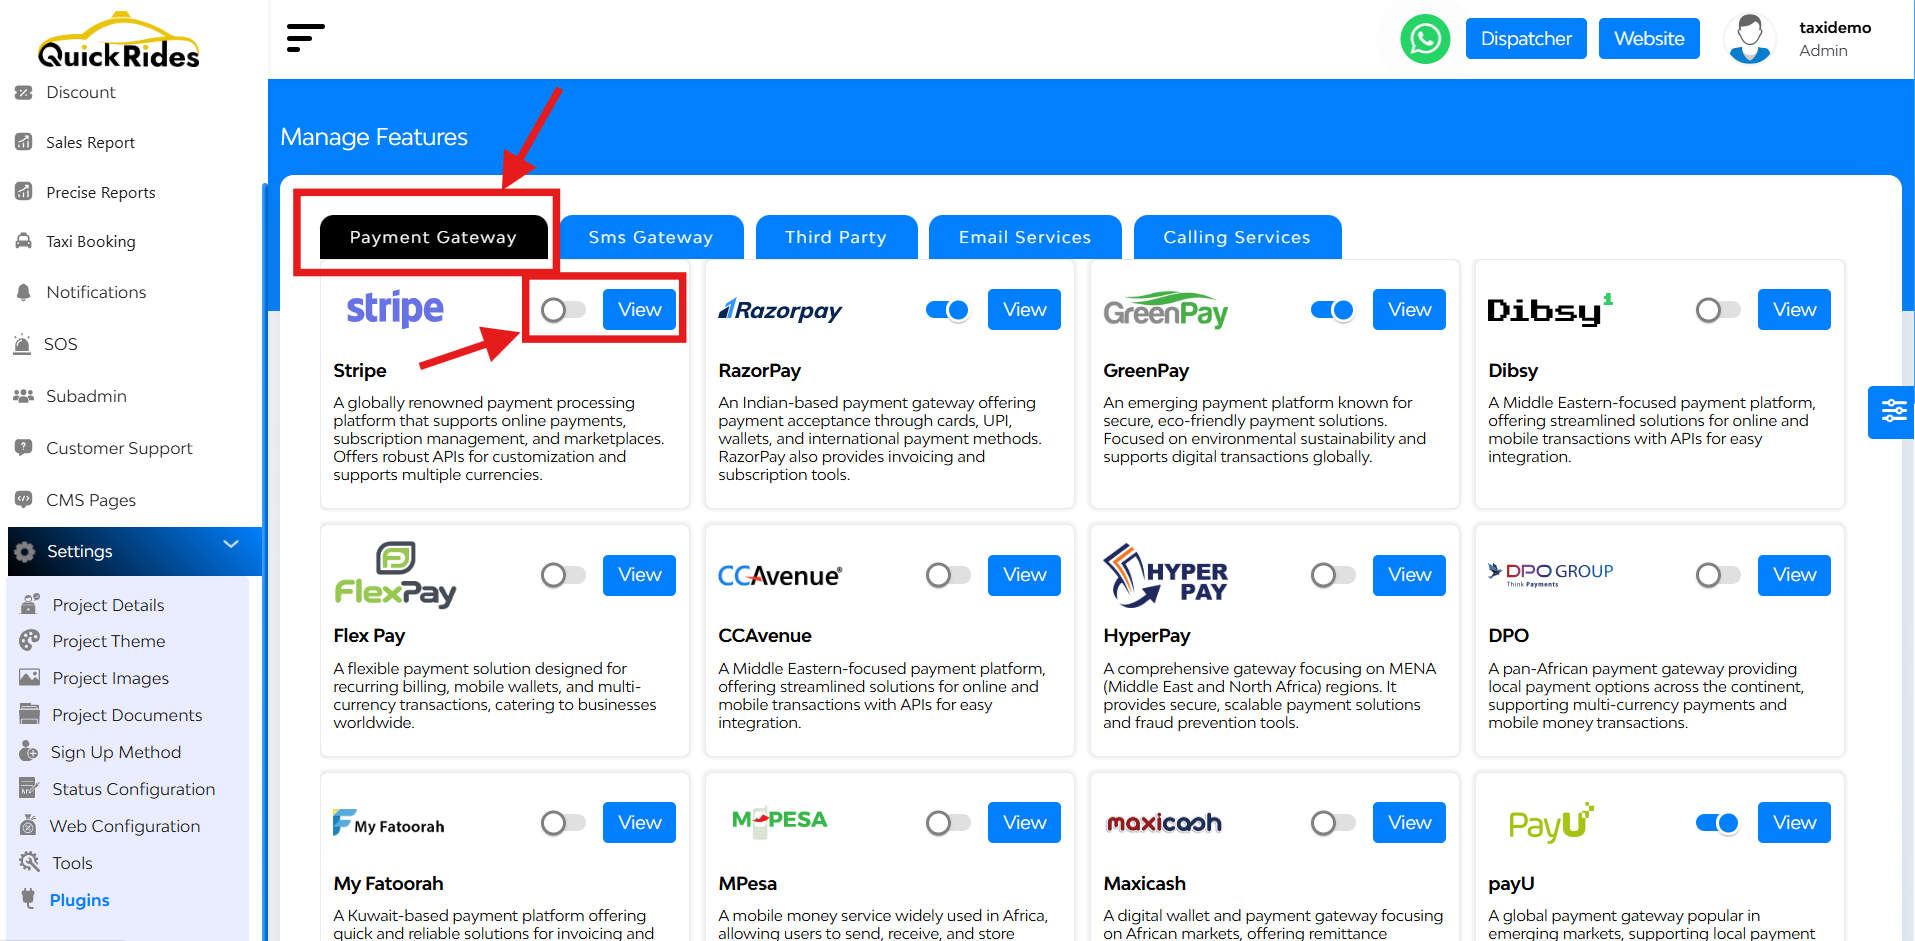
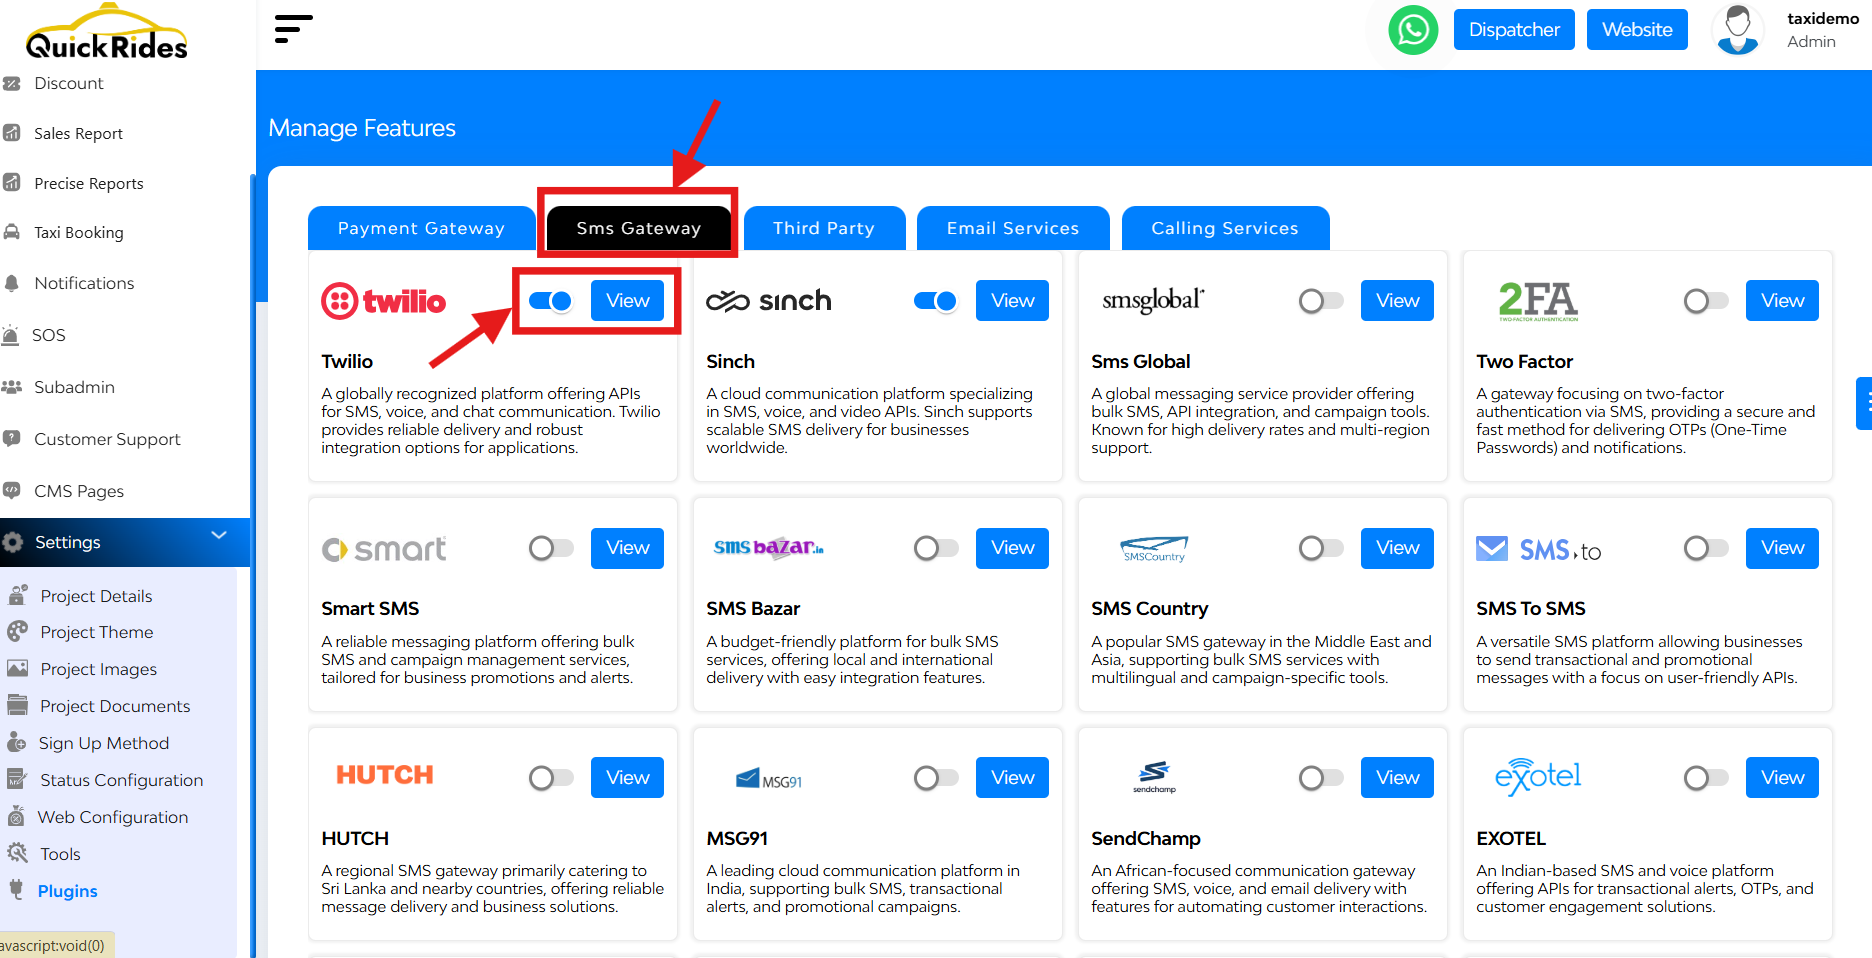
Each tab lets you toggle between multiple service providers and enable/disable them with just a switch.
Under Payment Gateway, you’ll see popular services like Stripe, RazorPay, GreenPay, Dibsy, and many others. Each plugin block includes:
- A short description about the gateway
- A toggle switch to enable or disable
- A view icon to preview
while tapping over the view button you can see a pop up will open. There you can see
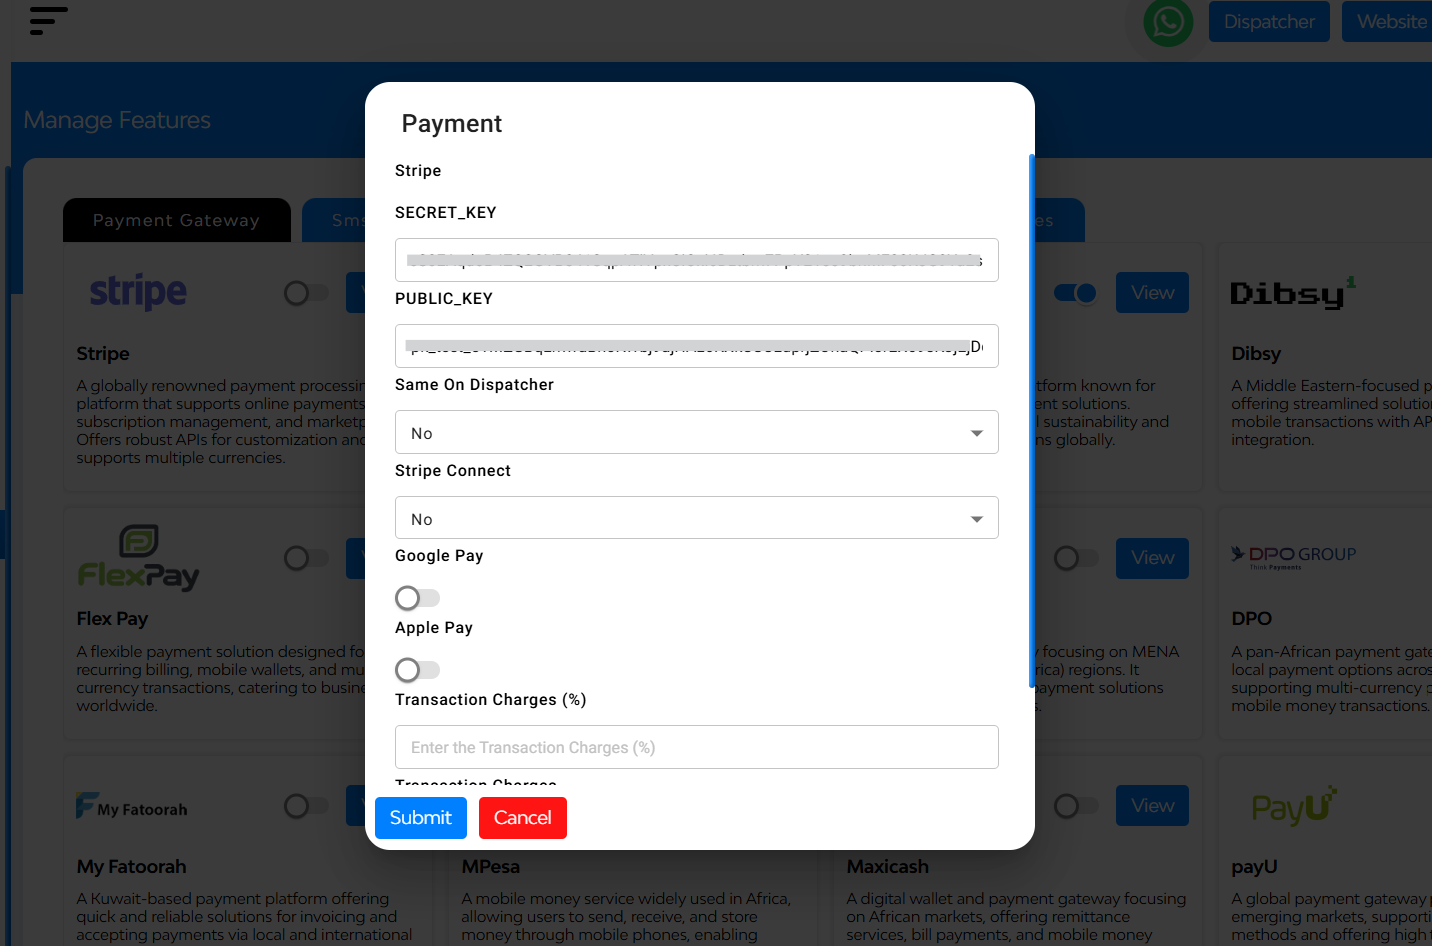
Here you can enter
- Secret Key
- Public Key
- Same on dispatcher (yes/no)
- Stripe Connect(yes/no)
- Select the toggle for Google Pay, Apple Pay, both
- Transaction Charges (%)
- Transaction Charges (Flat)
- CountryCode Merchant Name
- Environment
At the bottom two buttons are there ‘submit’, ‘cancel’
Under SMS Gateway, you’ll see popular services like Twilio, Sinch etc. With a toggle-based activation system and form-based credential input, enabling these services is as easy as flipping a switch and pasting in keys or tokens.
while tapping over the view button you can see a pop up will open. There you can see:
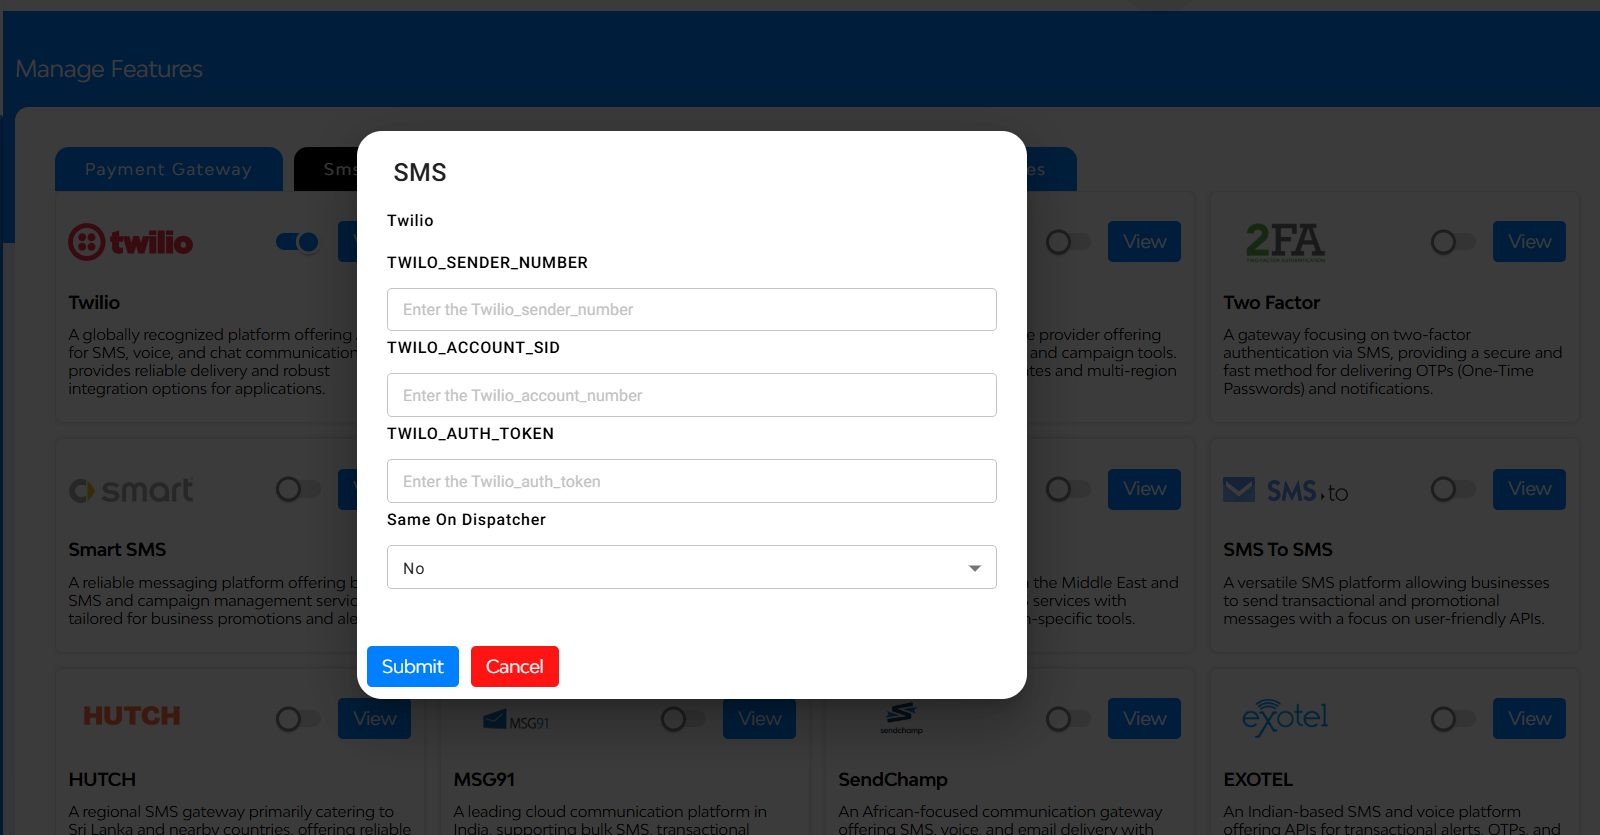
By entering your sender number, Account SID, Auth Token and same on dispatcher (yes/no). Once configured, you can send real-time alerts to users by hitting the ‘submit’ button at the bottom..
Under Third Party, you’ll see popular services like Firebase Private Key or Zendesk.
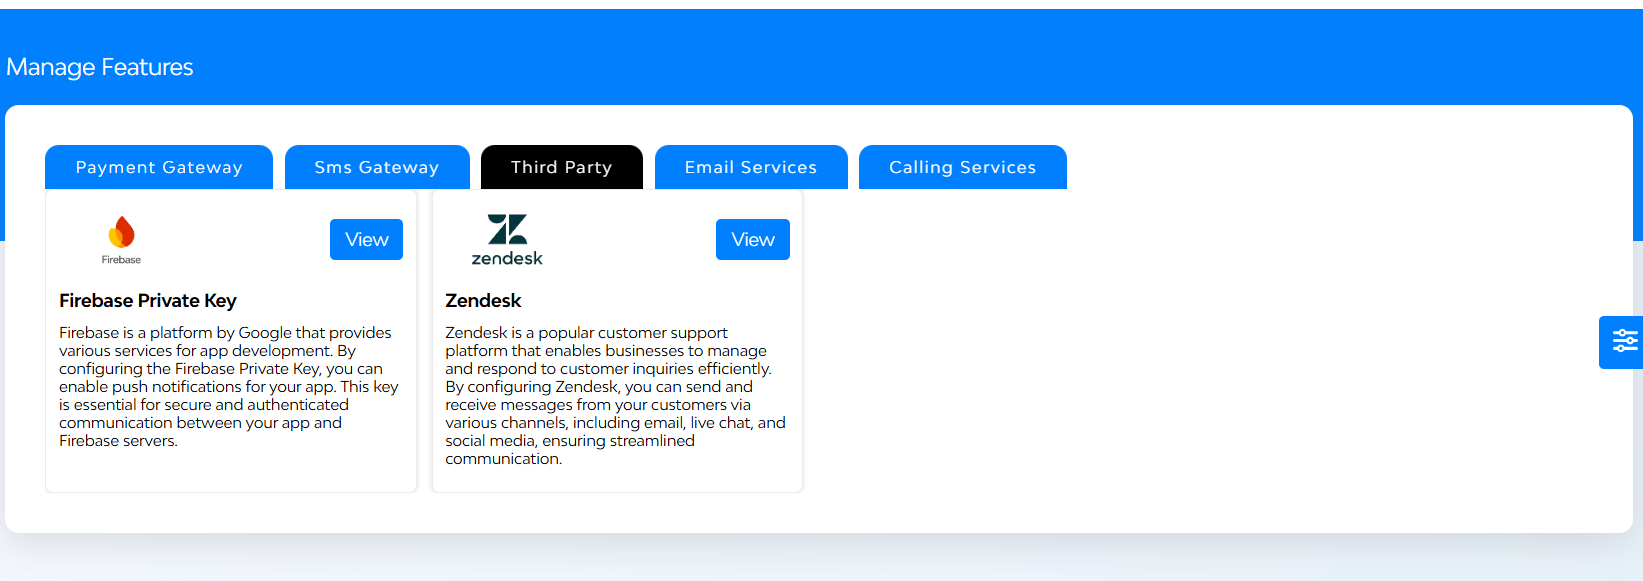
while tapping over the view button you can see a pop up will open. There you can see
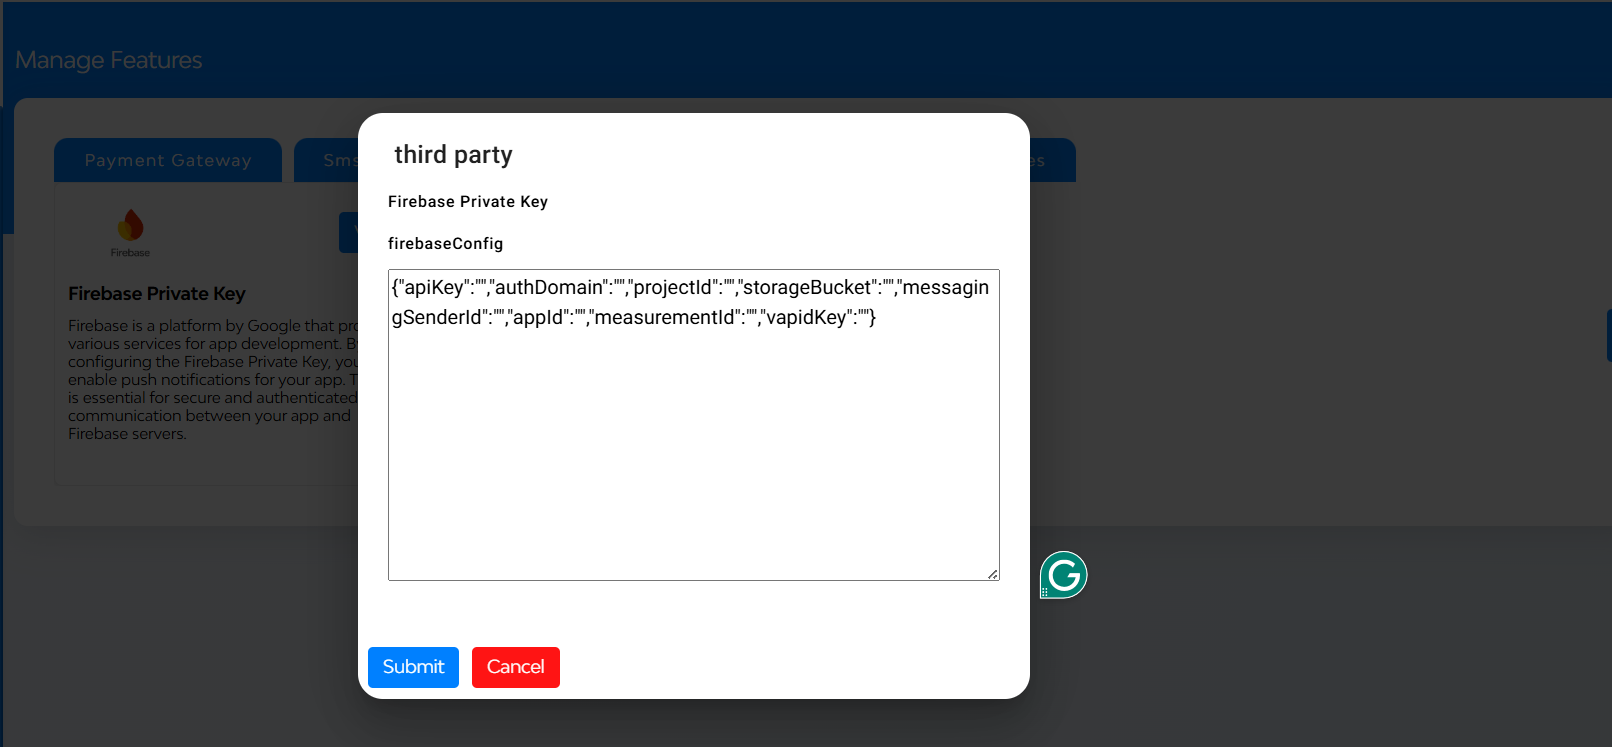
Just paste your Firebase JSON key and submit!
Under Email Gateway, you’ll see popular services like SendGrid, MailChimp, Node Mailer etc.
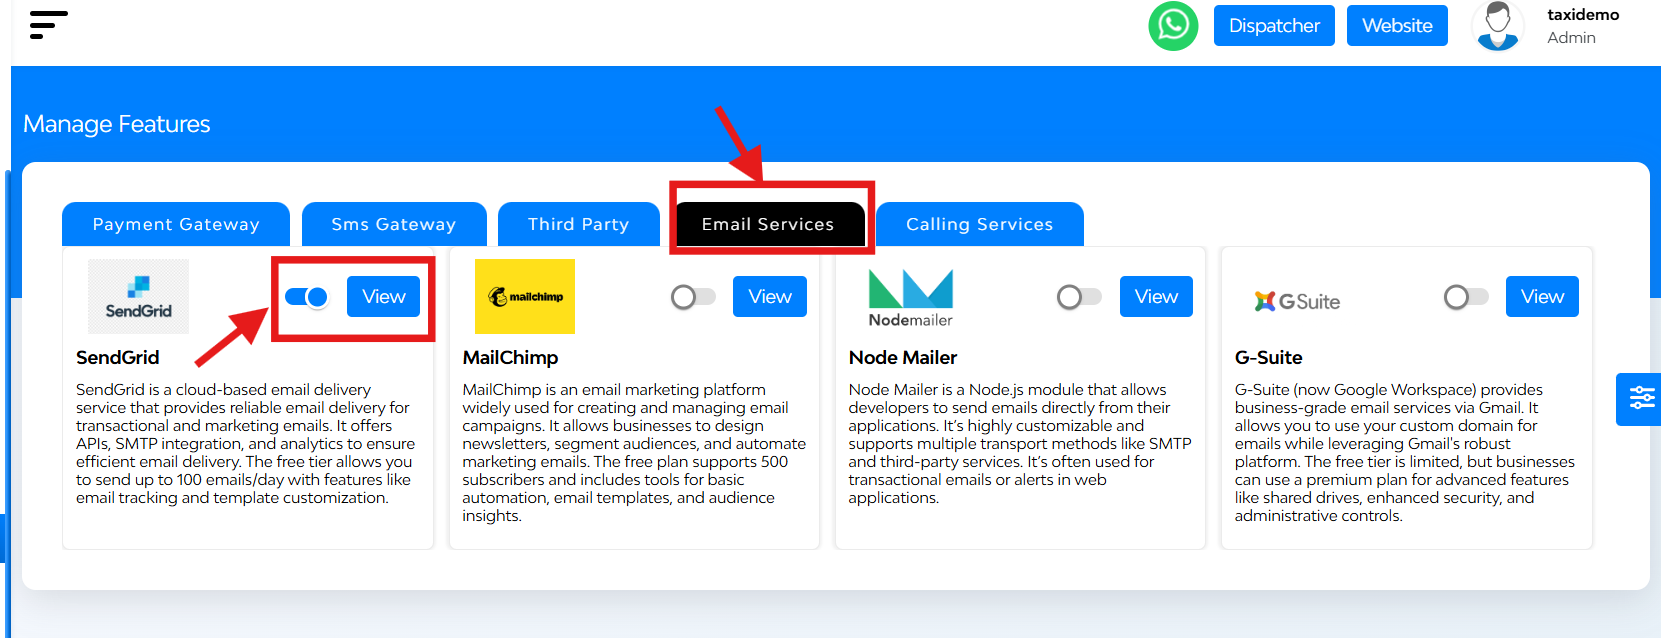
while tapping over the view button to open the configuration modal. There you can see
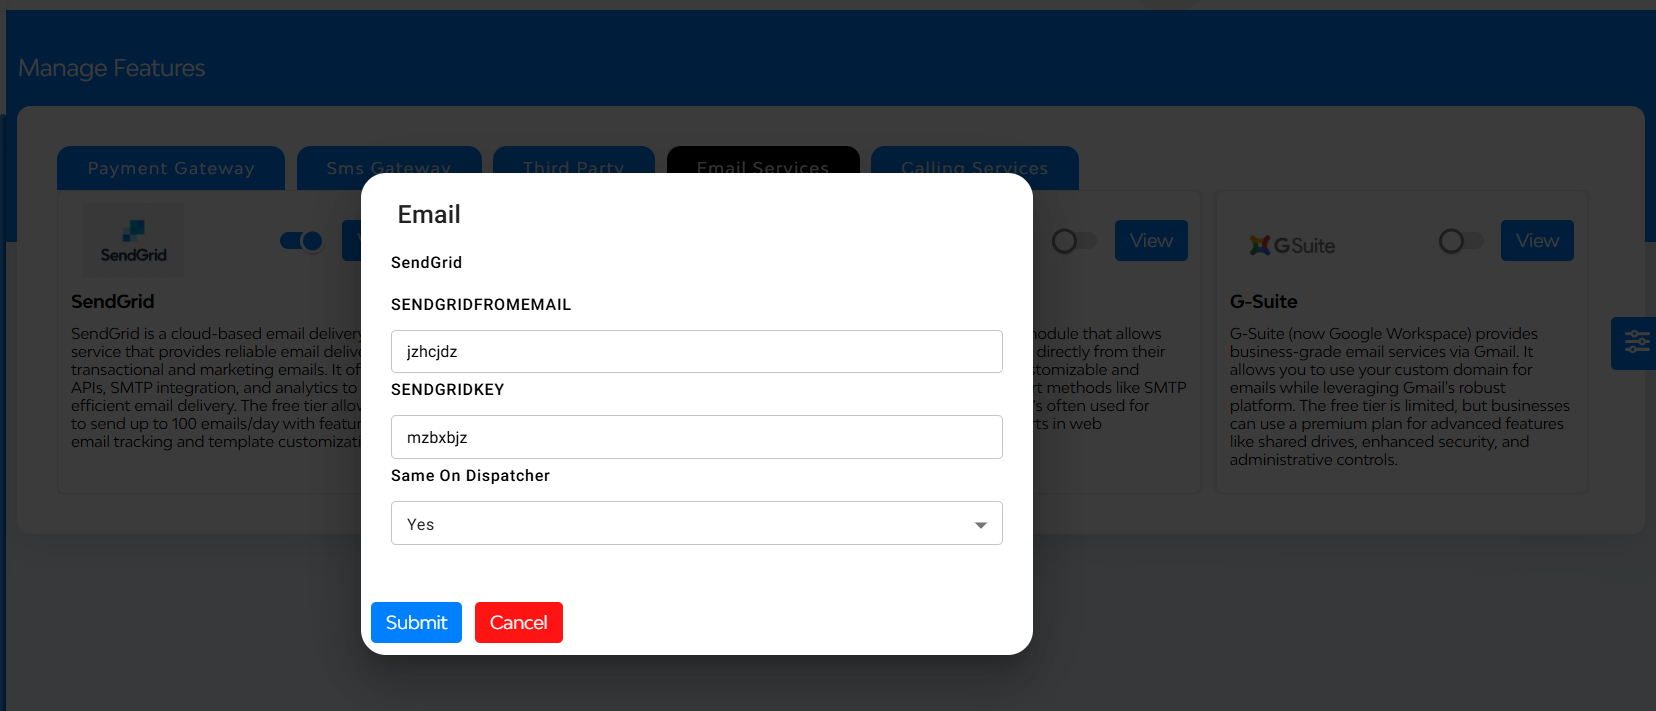
Enter details like SendGridFromEmail, SendGridKey, same on dispatcher (yes/no) and hit Submit to activate.
Under Calling Gateway, you can automate voice calls and manage IVRs with Exotel or Twillio.
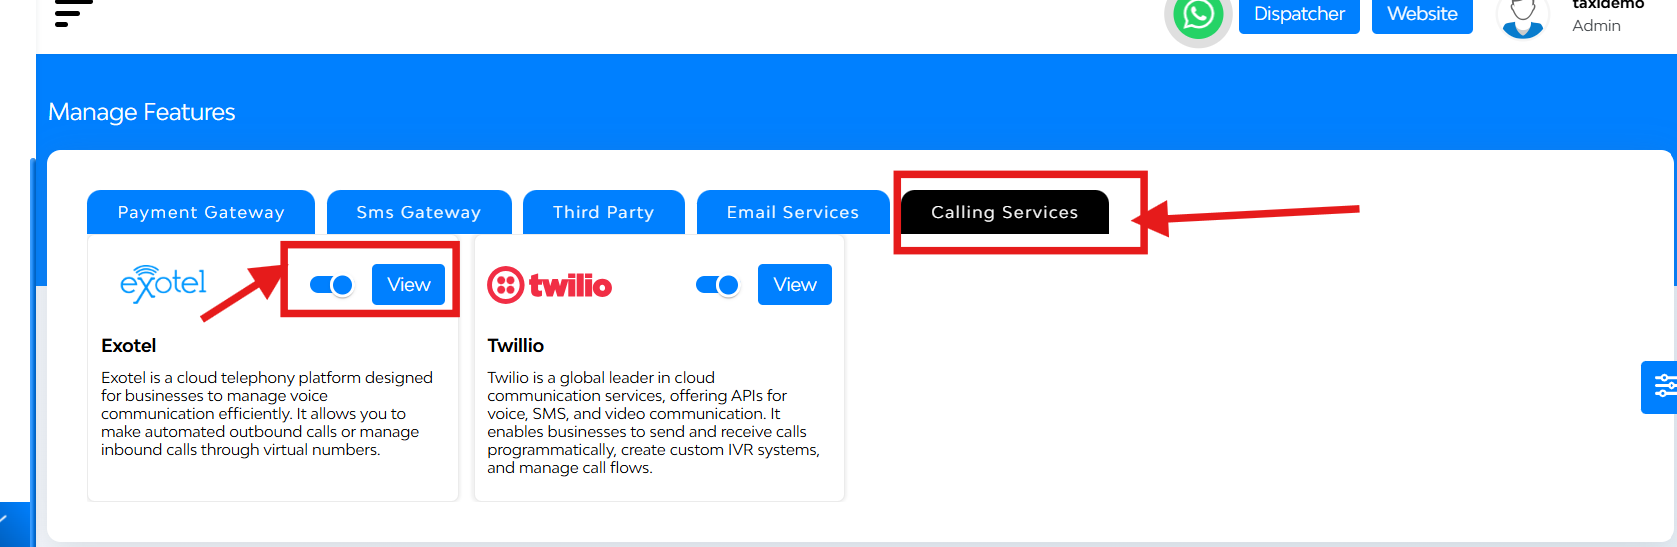
while tapping over the view button to open the configuration modal. There you can see
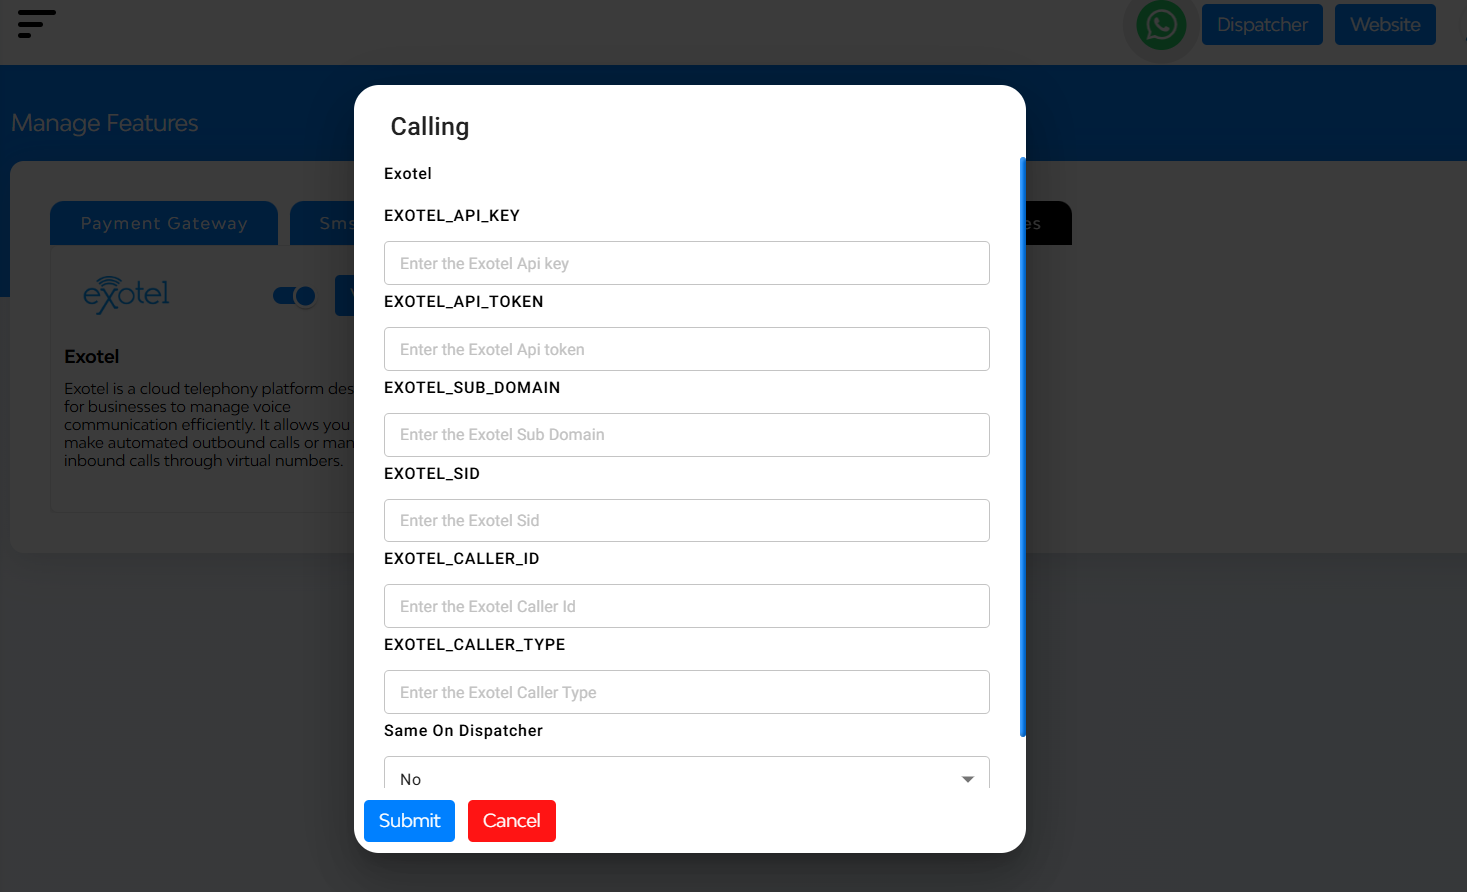
Configuration fields include API Keys, API Token, Sub Domain, SID, Caller ID, Caller Type, same on dispatcher(yes/no). Once filled, hit Submit to go live.
View Demo


How to Add Users

Dispacher Panel Walkthrough